We appreciate you deciding to purchase one of the WordPress themes from BZOTech. Please review this information if you are adjusting the theme and can’t find your answer in our documentation. These are some typical adjustments to our WordPress templates. This material will be updated often. To stay up to date with our news, you may bookmark it.
If you have any question, please feel free to contact us!
While importing demo content, you may get error “Request Timeout” message or “Stop Working” message like this:
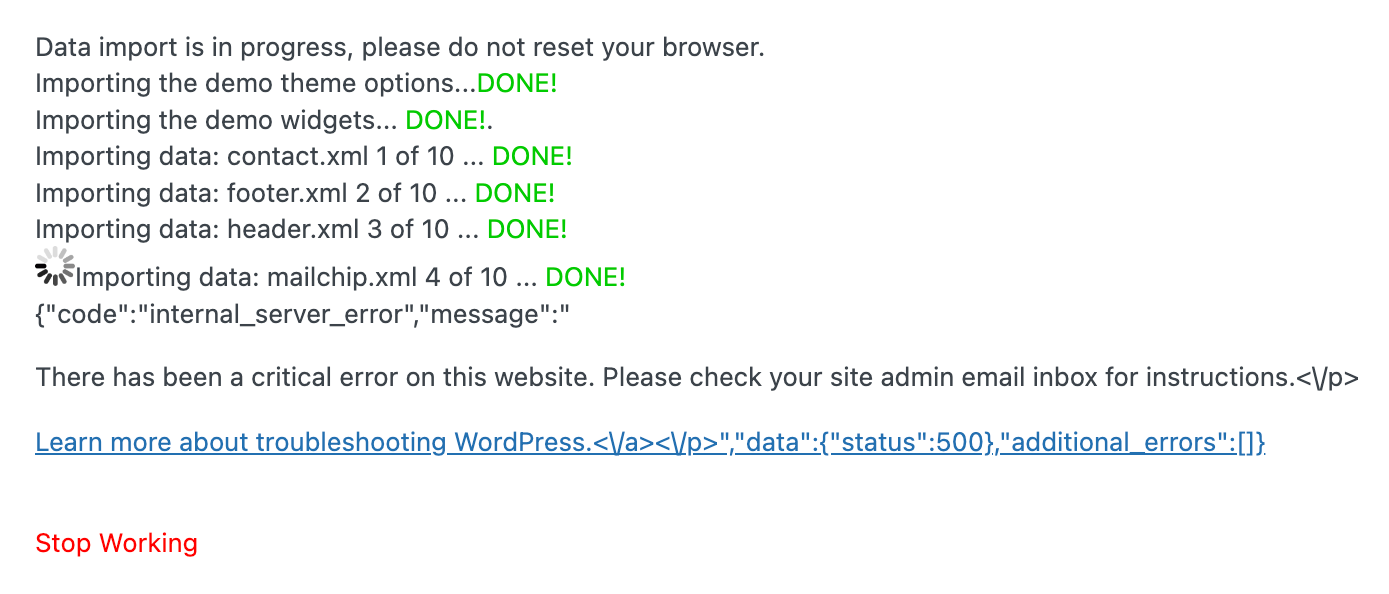
The fix is to raise the PHP limitations by modifying the php.ini file in the root directory, or you can contact your web host and request that they increase those limitations to a bare minimum, as shown below.
max_input_time = 6000memory_limit = 128Mmax_execution_time= 6000post_max_size = 64Mupload_max_filesize = 32Mset_time_limit (600)
To update theme, download the latest package from Themeforest -> delete the old theme and reinstall the new theme package.
Note:
- Make sure you do not modify any code files in our theme directory before updating to make sure your customizations are not lost when updating. If you need to backup your theme before updating. You should use the Child Theme to customize the theme.
- The widget setting is not saved when you update theme, BEFORE update theme, please open the widget setting in a new window and keep it to compare after update.
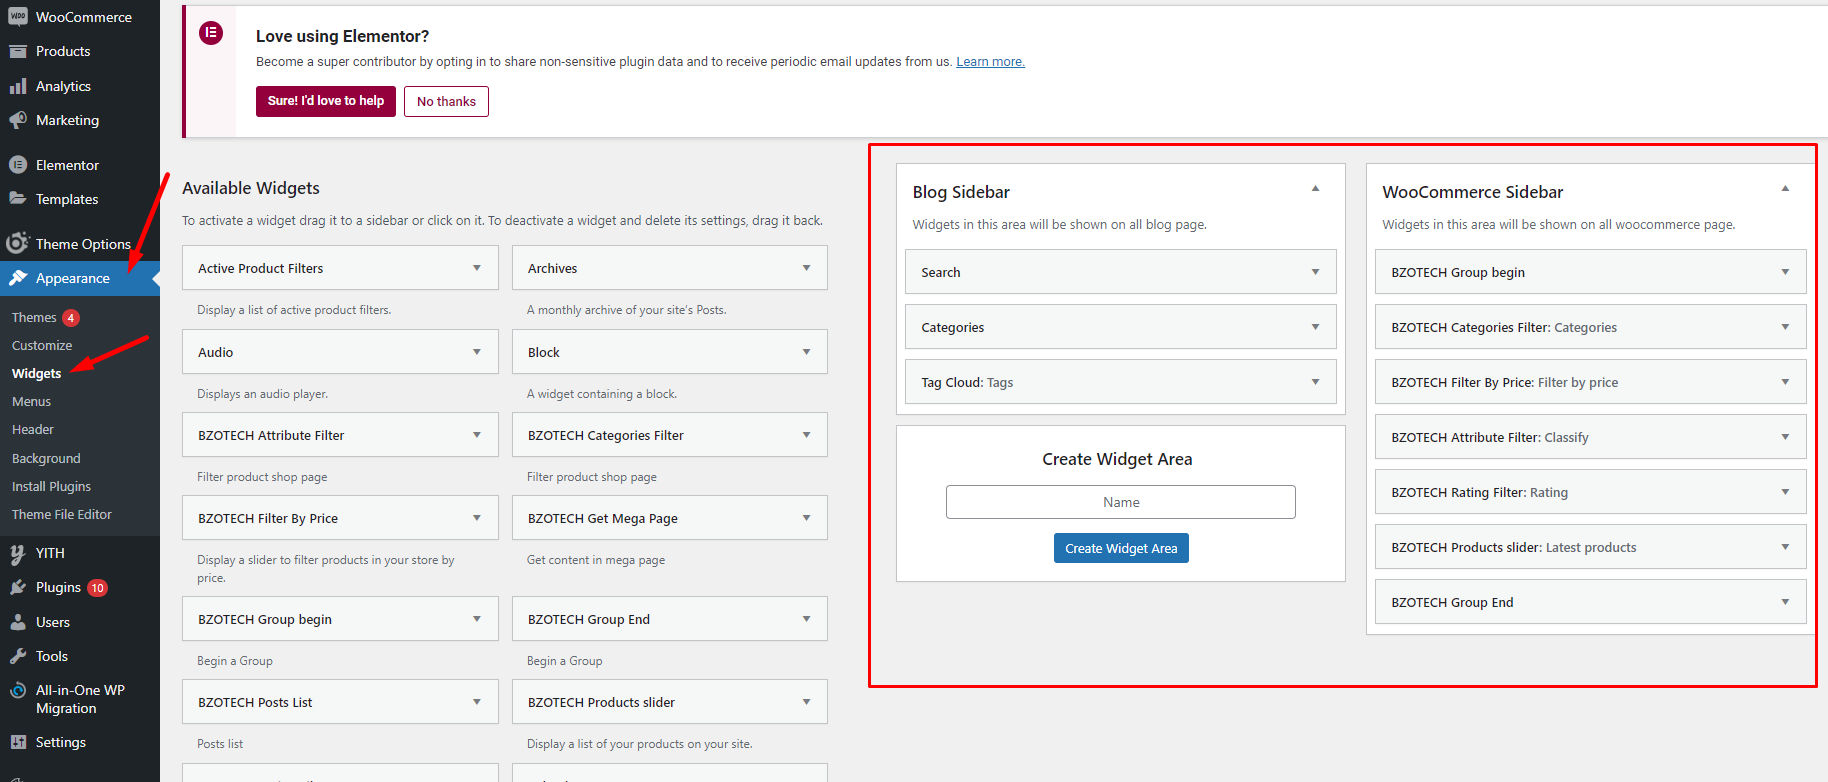
2.1. Change Header Logo
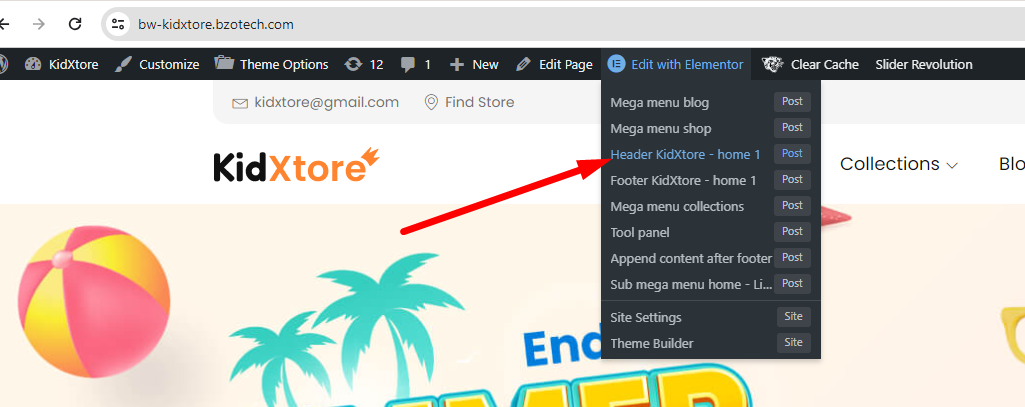
Login to Admin -> Go to site -> Hover on Edit with Elementor -> Select Header x (x is the sequence number of the header).


2.2. Change Footer Logo
Login to Admin -> Go to site -> Hover on Edit with Elementor -> Select Footer x (x is the sequence number of the footer).

Go to Admin -> Setting -> General -> Check the option 'Anyone can register'.

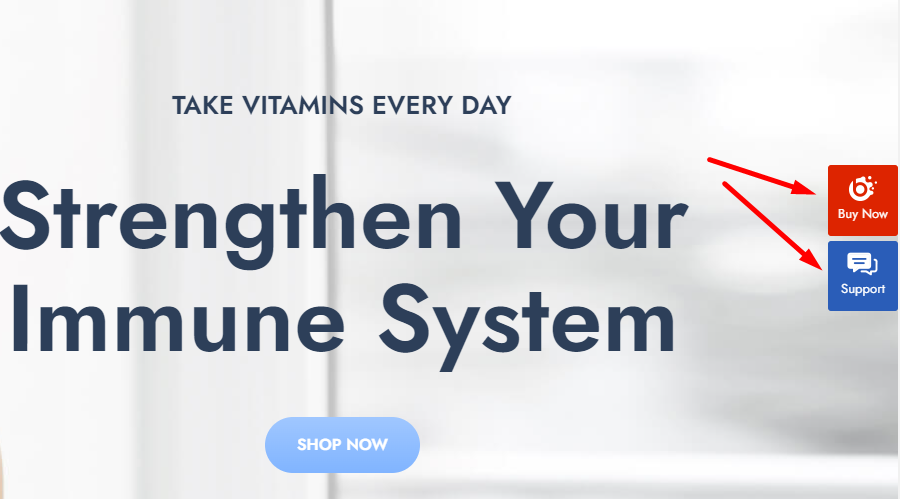
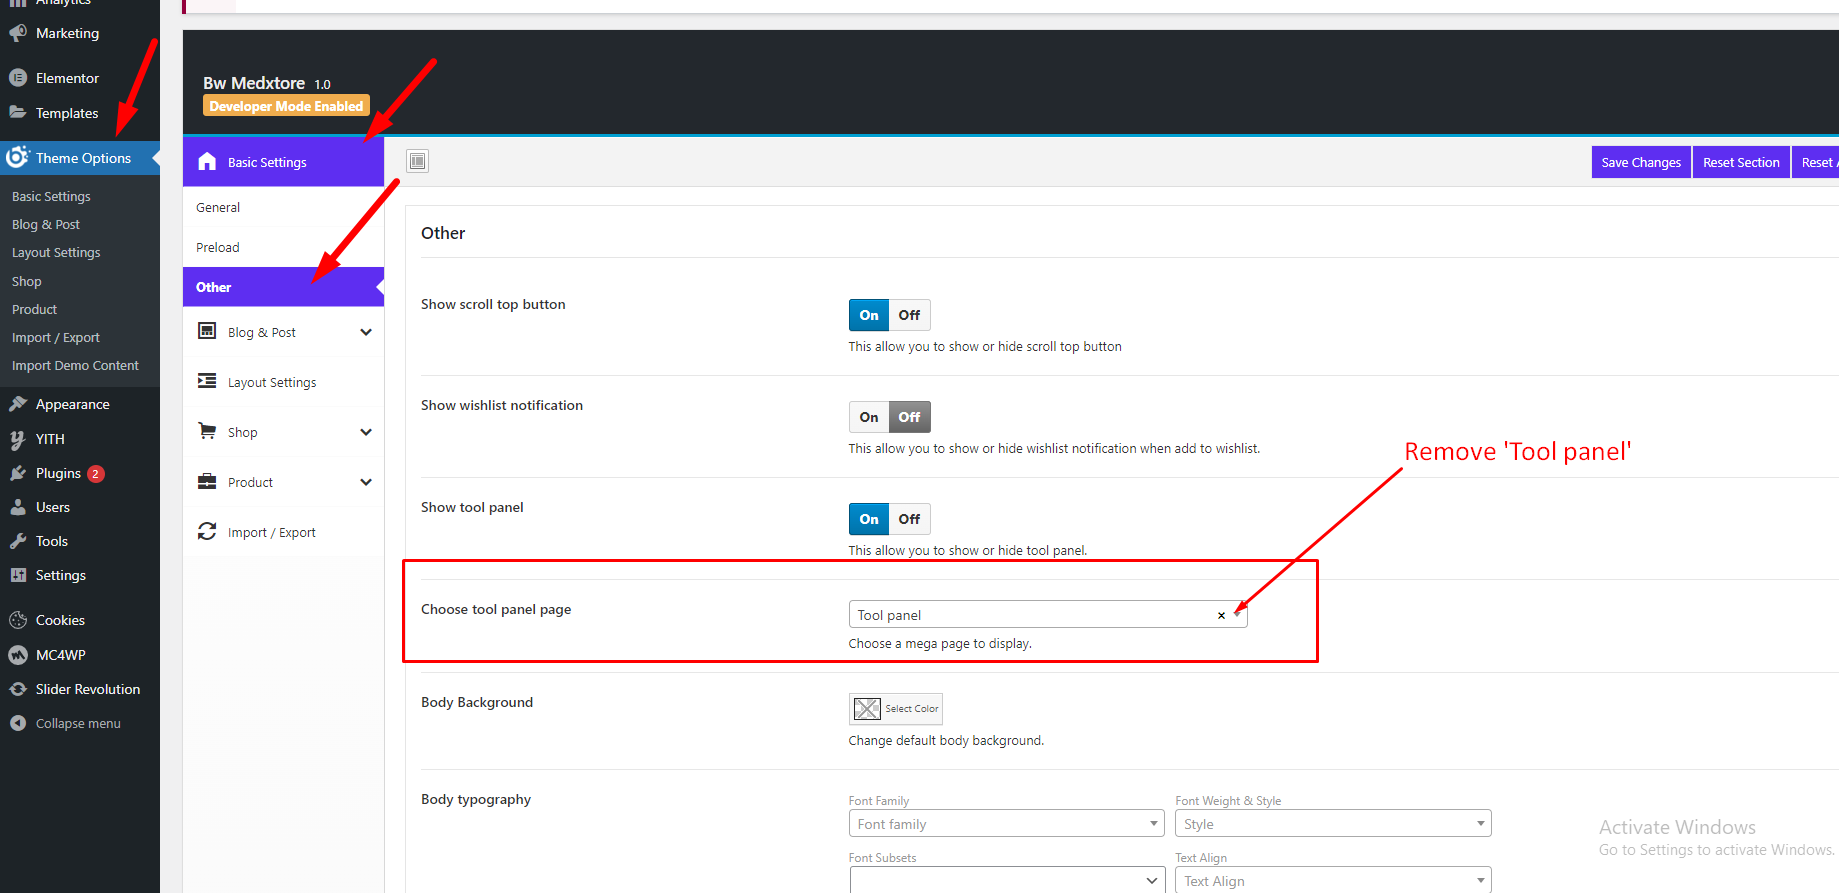
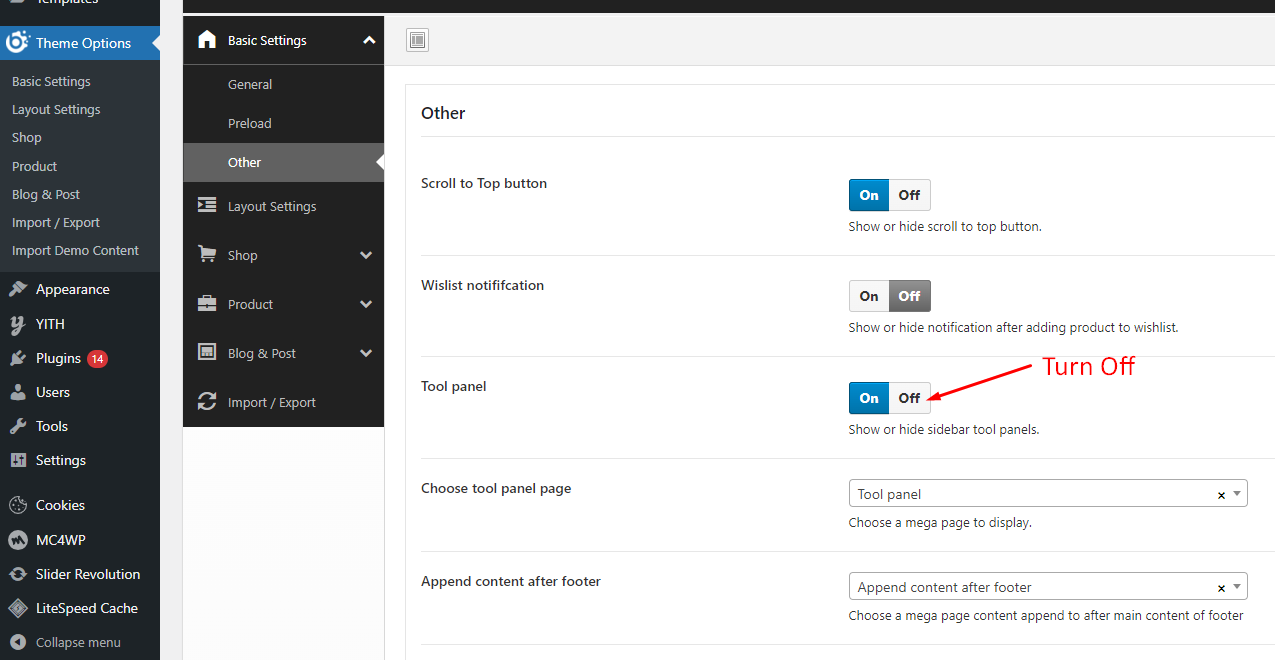
Go to Admin -> Theme Options -> Basic settings -> Other -> Remove Tool panel. or turn off ‘Tool panel’ option.
OR
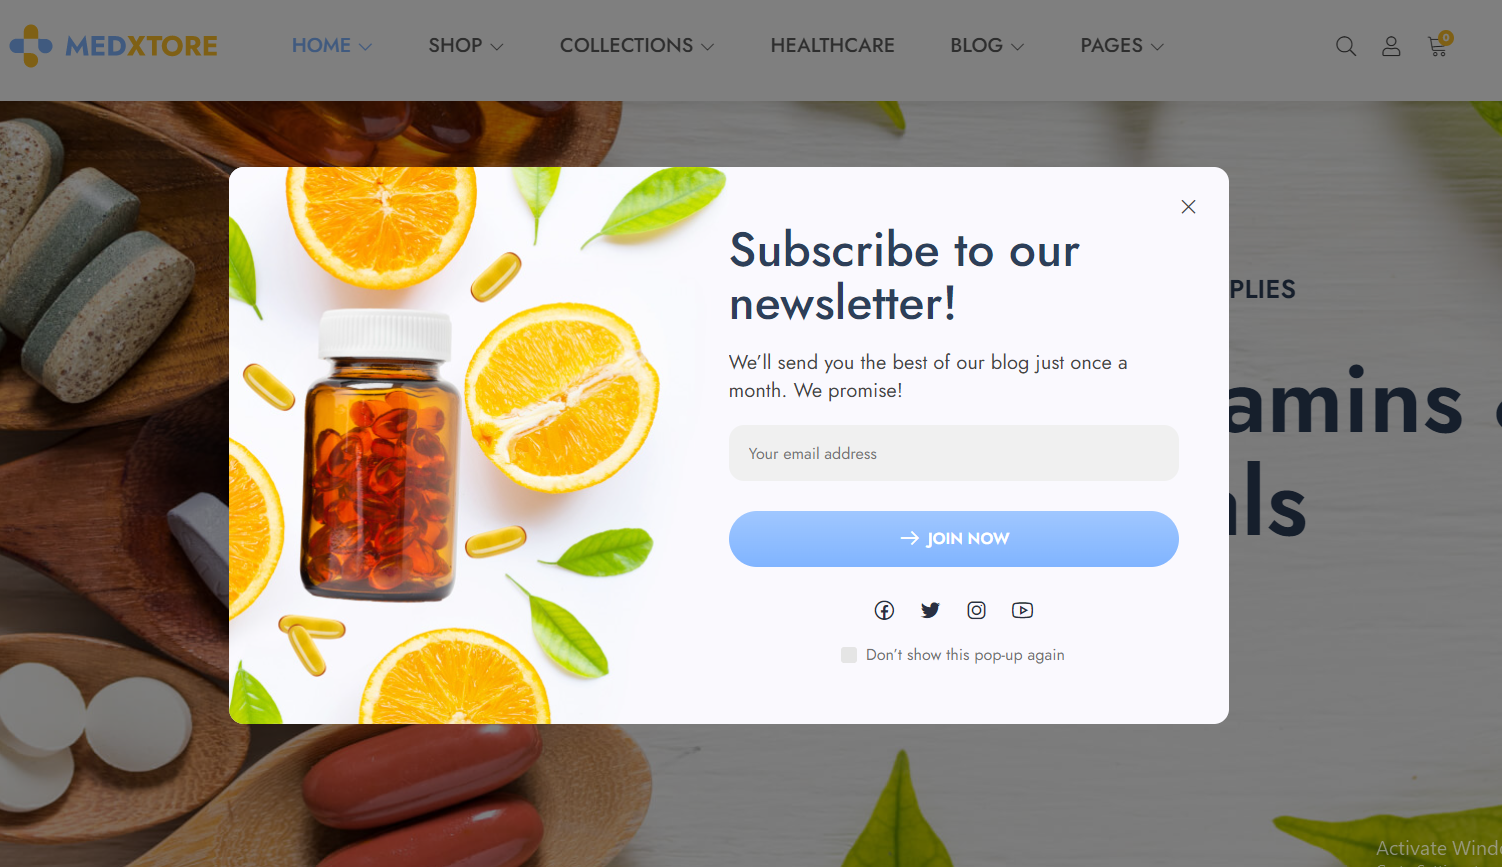
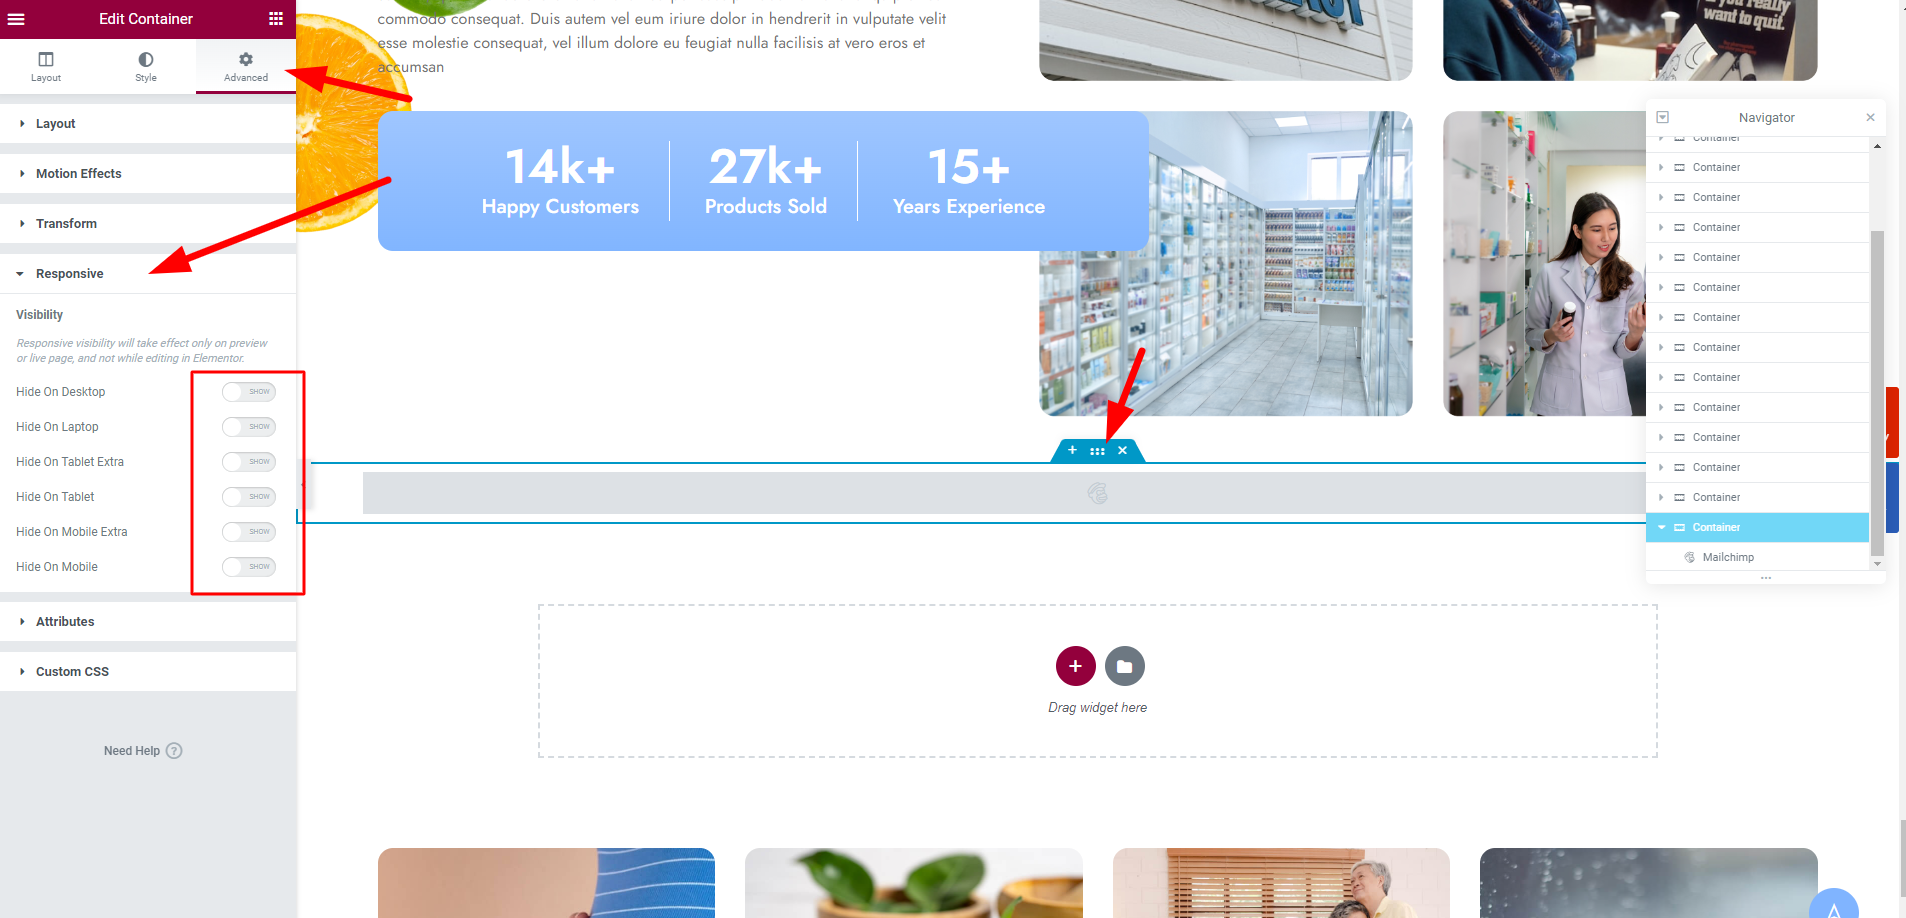
Login to Admin -> go to Homepage frontend -> Edit with Elementor -> Scroll down to mailchimp section -> Left sidebar -> Advanced -> Responsive -> Turn off all options.
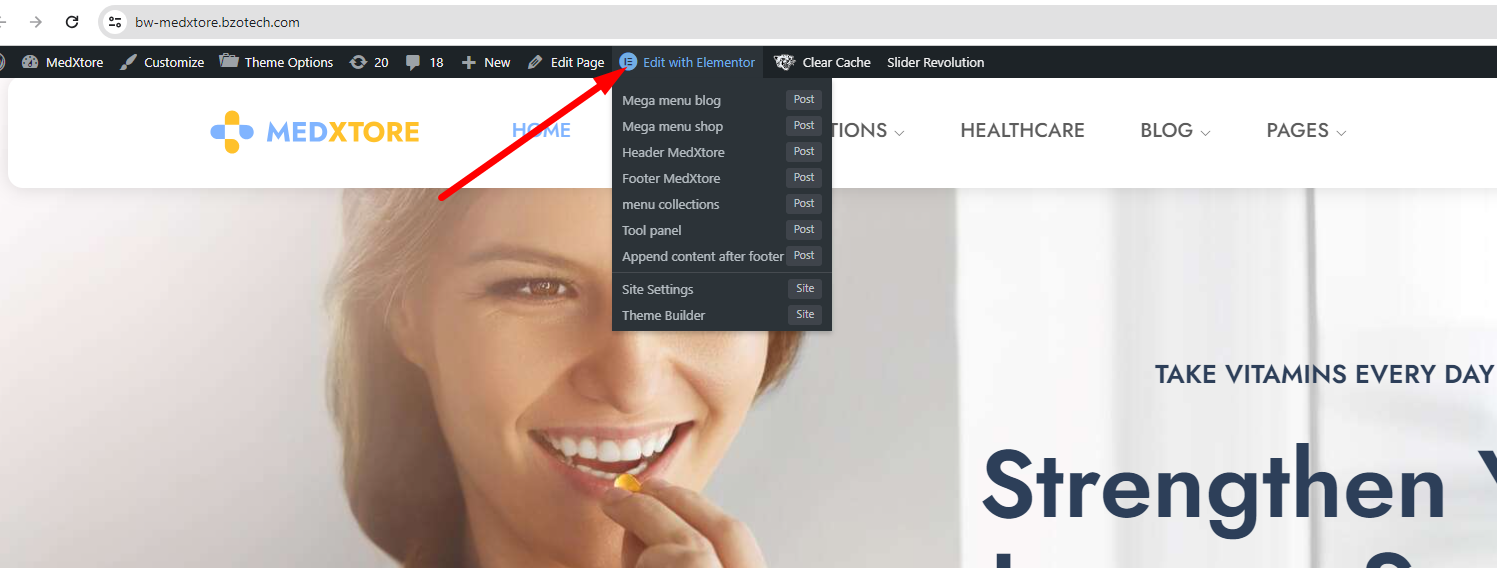
If you wanna to remove it, simply delete this section.

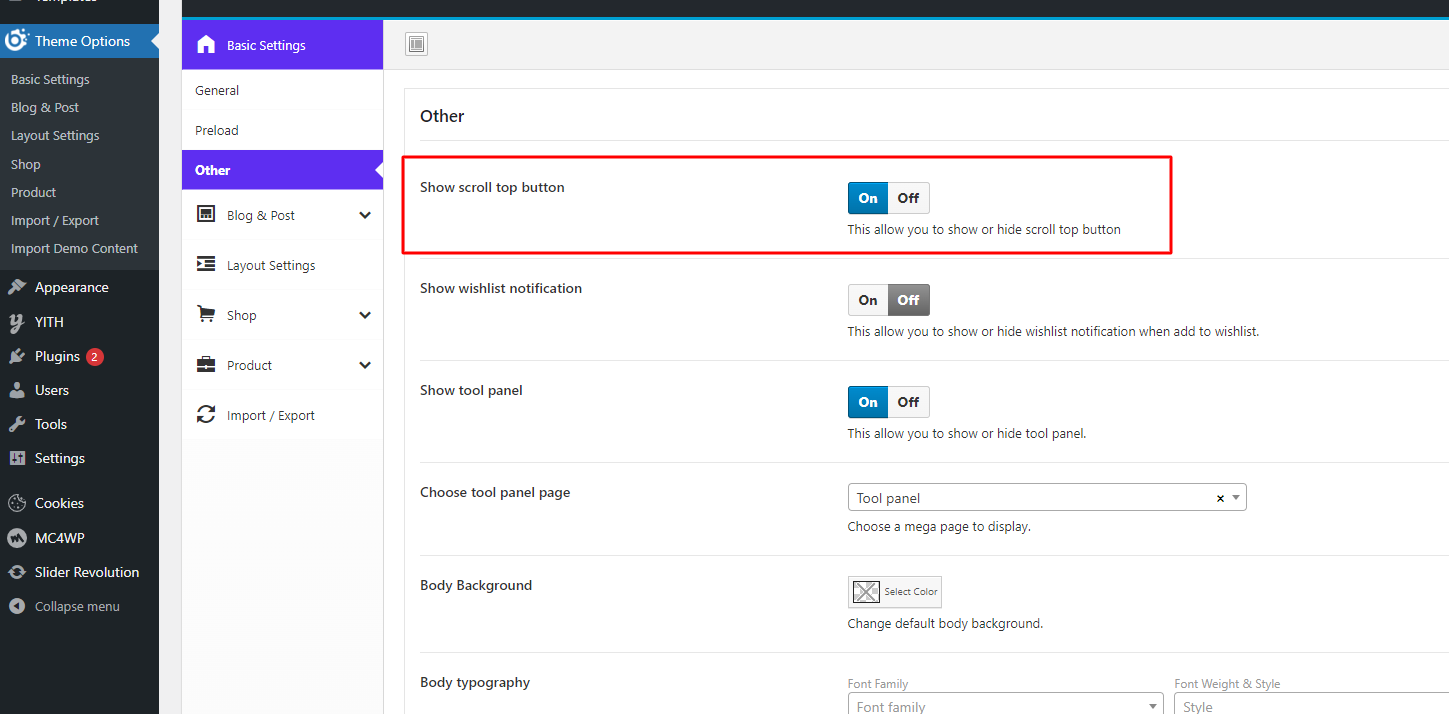
Go to Admin -> Theme Options -> Basic settings -> Other -> Show scroll top button.
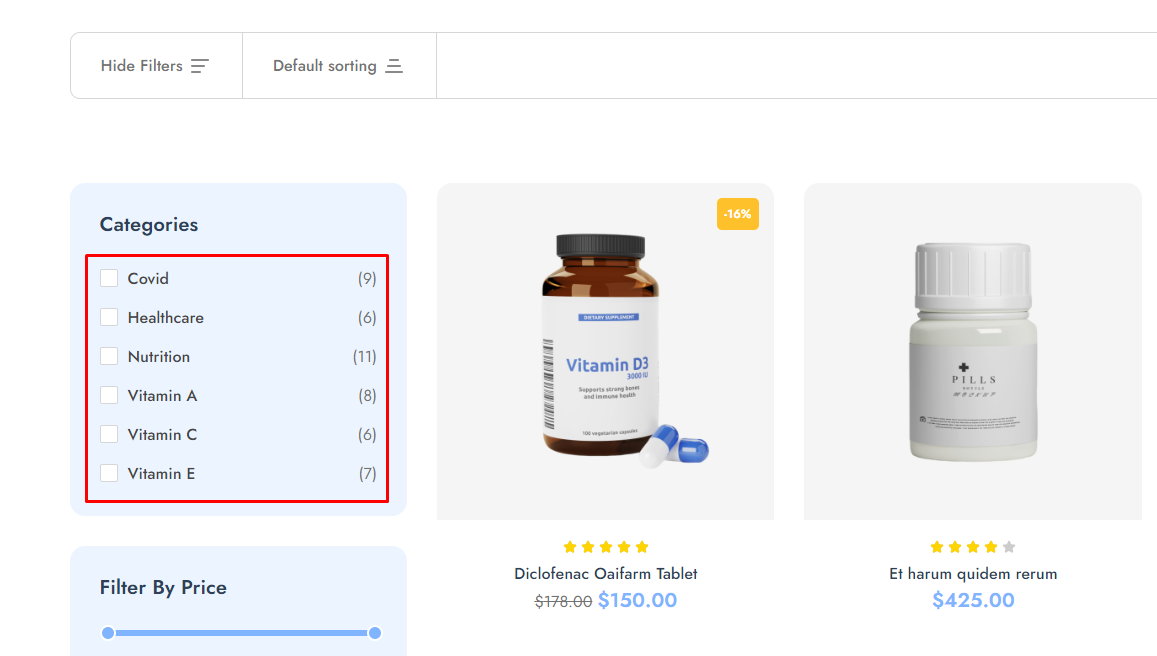
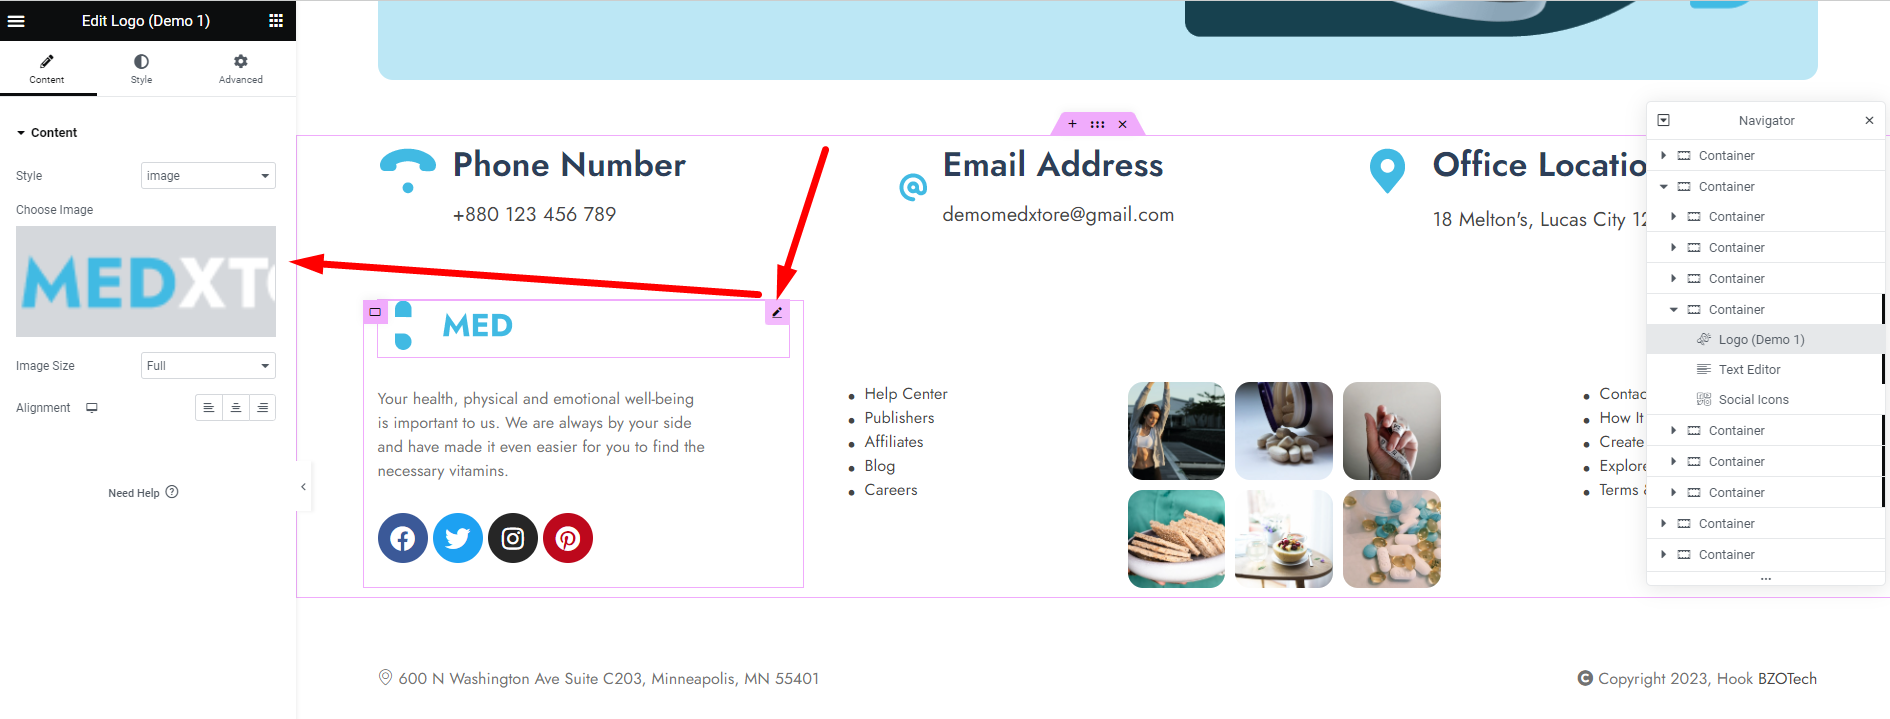
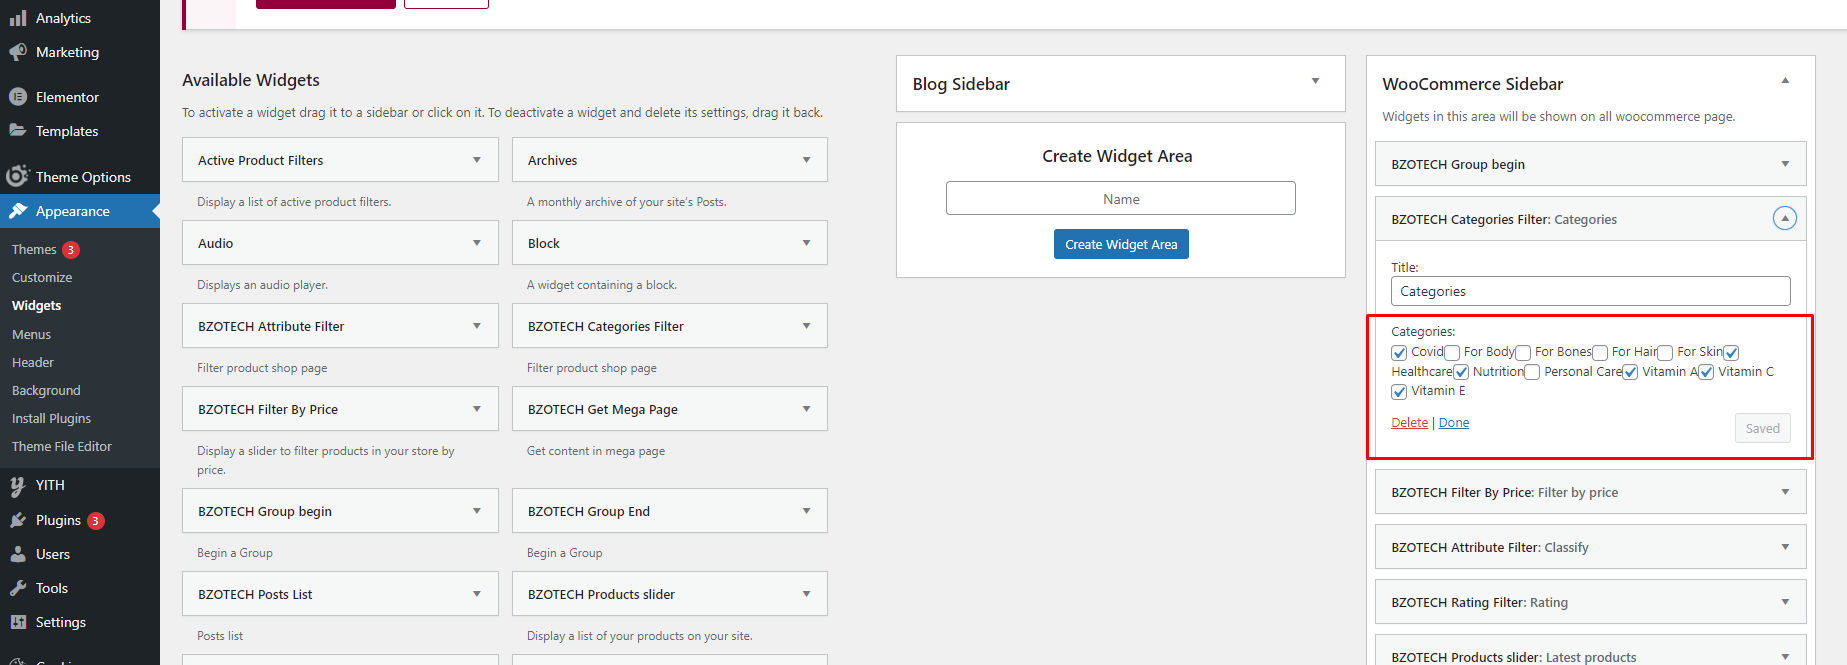
Go to Admin -> Appearance -> Widgets -> WooCommerce Sidebar -> BZOTech Categories Filter.
Go to Pages -> Default homepage -> Edit -> Page Settings -> General Settings -> Unselect header and footer style.

Go to General setting -> select the header, footer of default homepage.
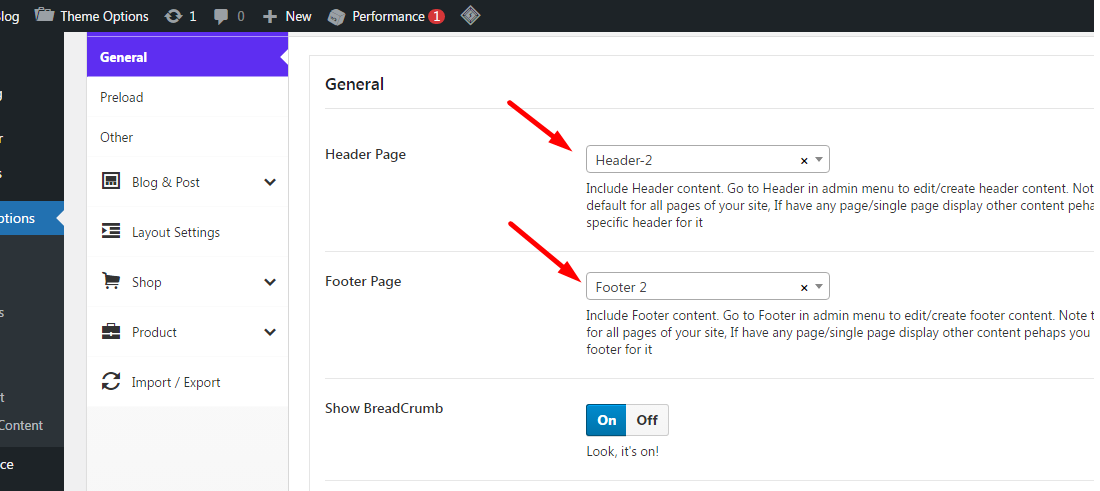
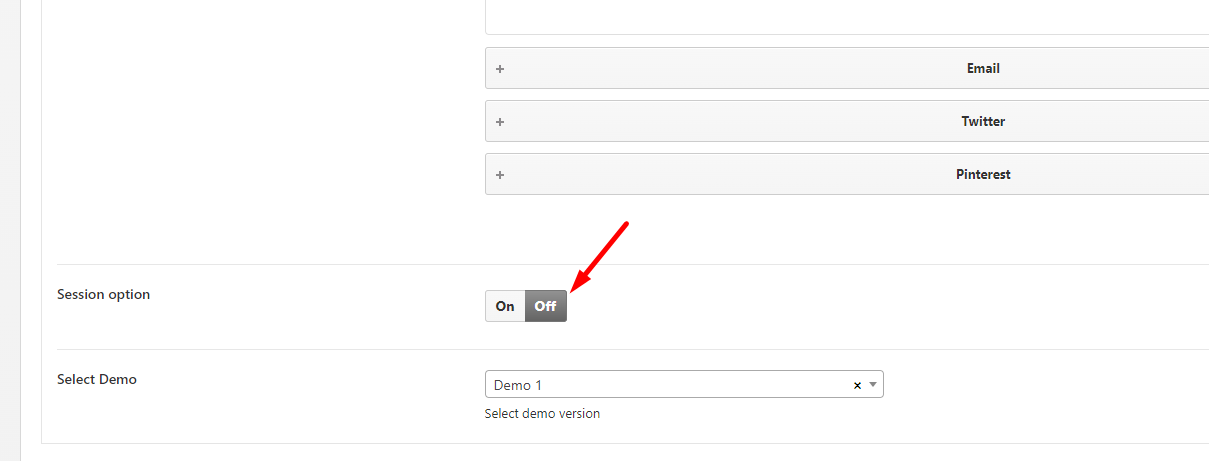
Go to Theme Options -> Basic settings -> Others -> Turn off Section.

In Admin Dashboard, go to WooCommerce -> Setting -> Currency


- Go to your WordPress Dashboard. Make sure you’re logged in as the administrator.
- Now Go to Appearance> Theme Editor
- You should see the ‘Theme Files” on the right. In the Theme- files choose “Theme Functions” (there will be a label underneath saying functions.php).
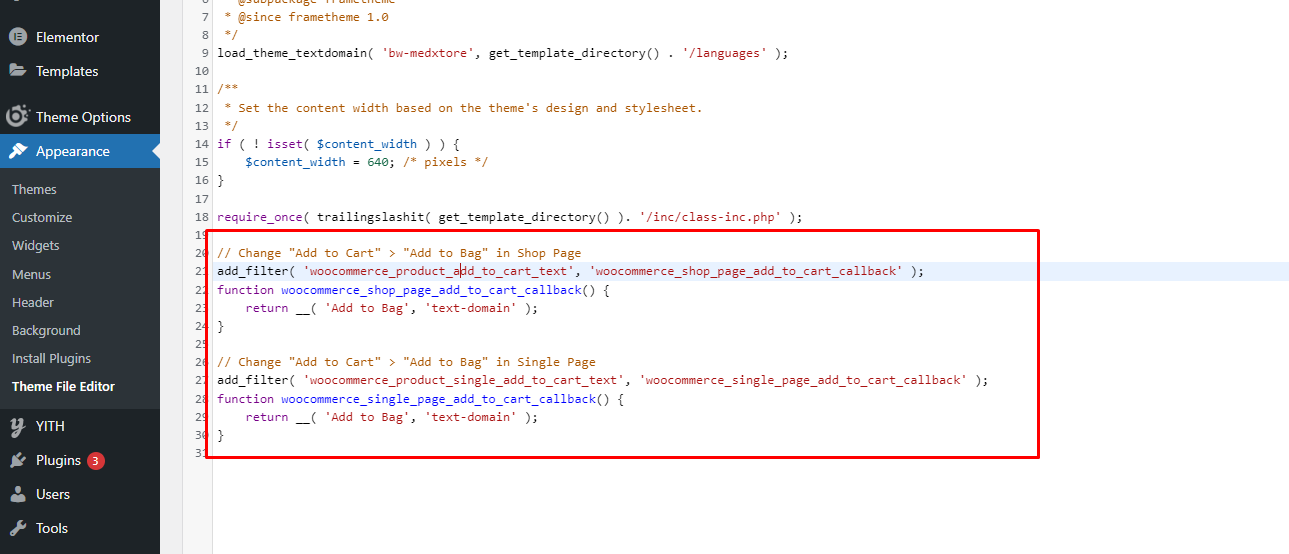
- Copy these below codes at the end of the functions.php file and Save:
// Change "Add to Cart" > "Add to Bag" in Shop Page
add_filter( 'woocommerce_product_add_to_cart_text', 'woocommerce_shop_page_add_to_cart_callback' );
function woocommerce_shop_page_add_to_cart_callback() {
    return __( 'Add to Bag', 'text-domain' );
}
// Change "Add to Cart" > "Add to Bag" in Single Page
add_filter( 'woocommerce_product_single_add_to_cart_text', 'woocommerce_single_page_add_to_cart_callback' );
function woocommerce_single_page_add_to_cart_callback() {
    return __( 'Add to Bag', 'text-domain' );
}
Theme Options -> Basic Settings -> Other, scroll down and change the options -> Save Changes
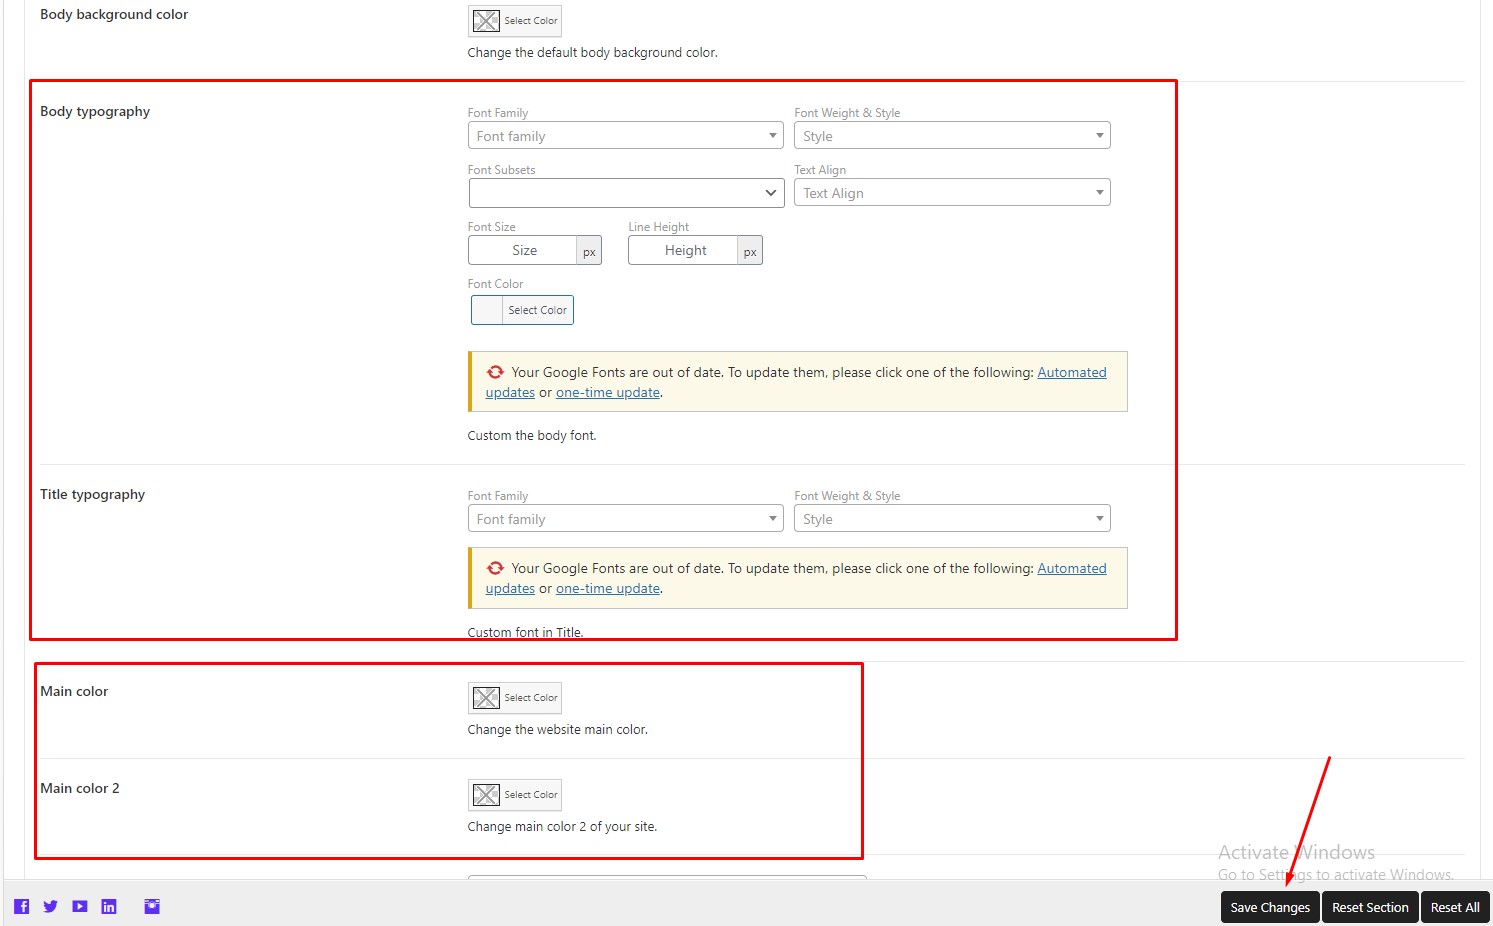
EDIT
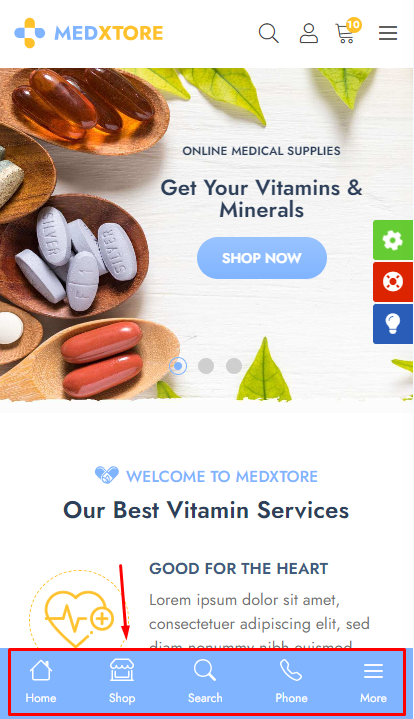
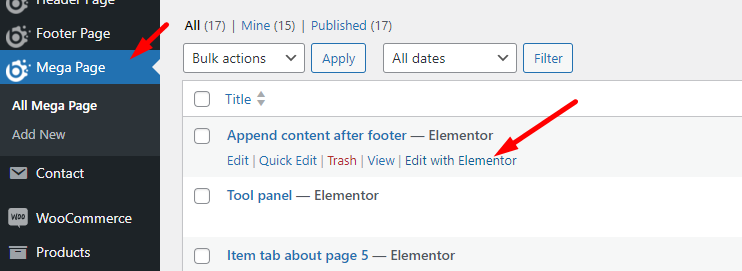
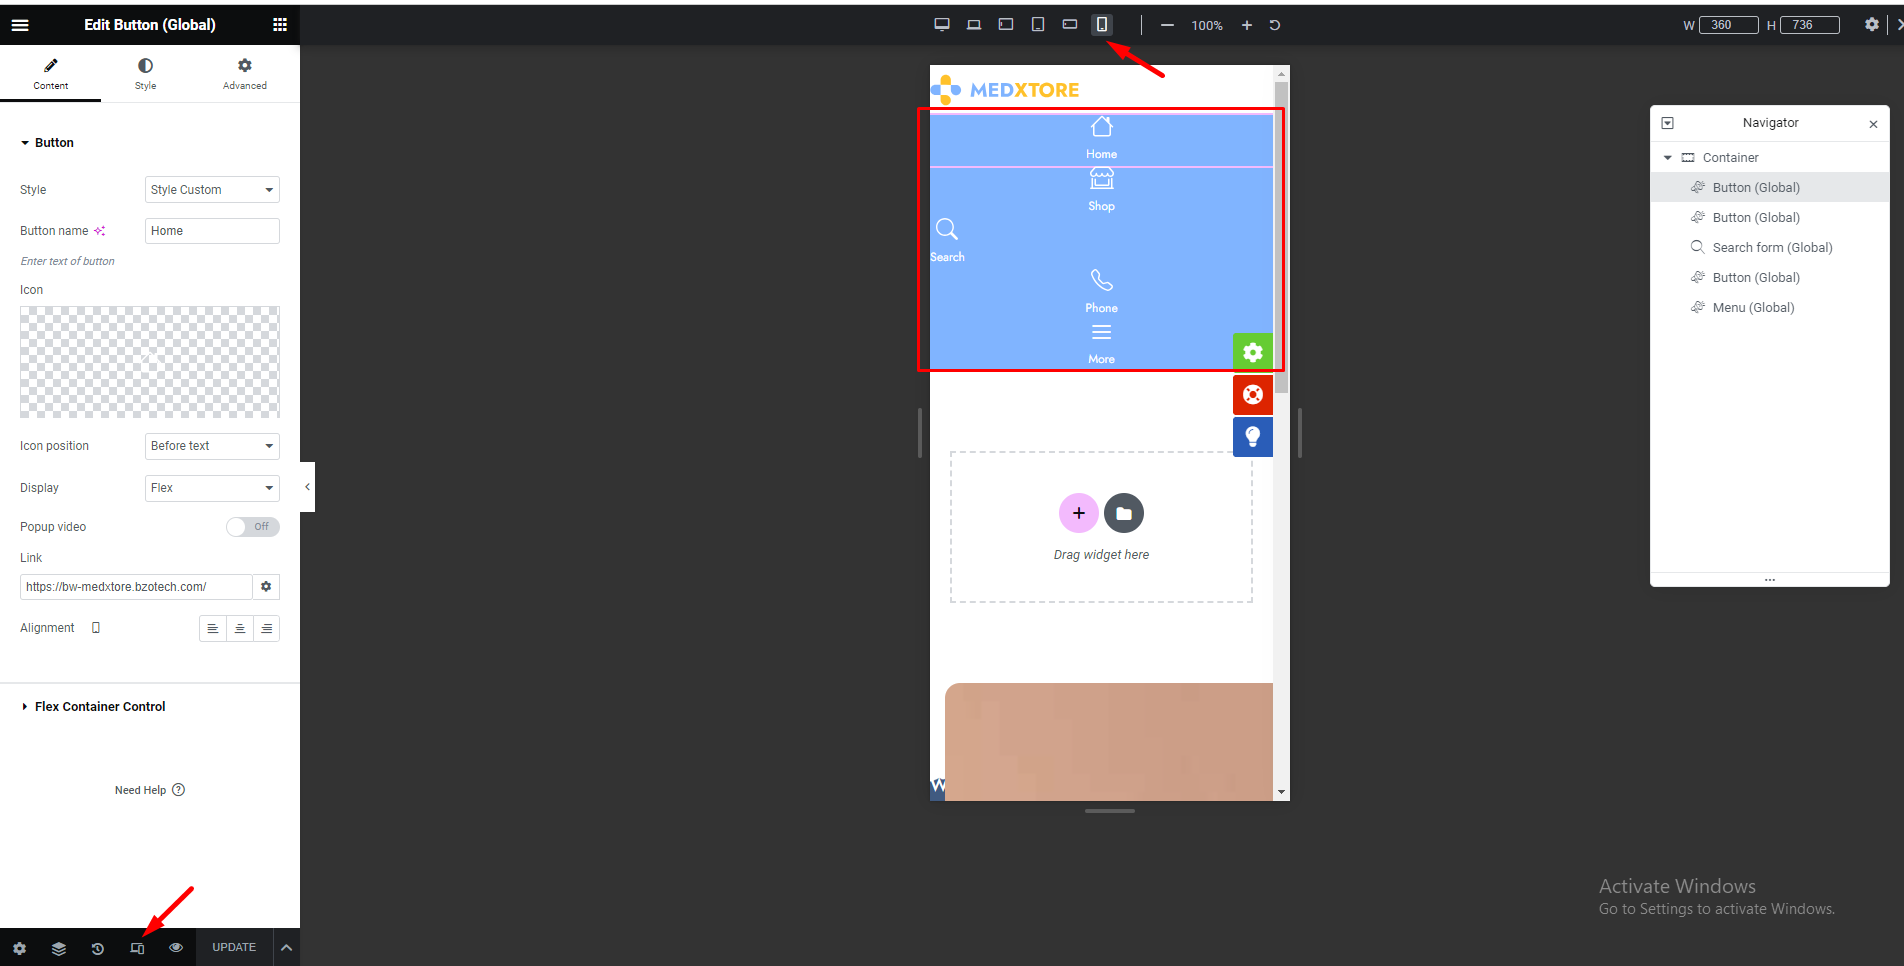
To edit mobile footer, in Admin Dashboard, go to Mega Pages -> Append content after footer -> Edit with Elementor and edit with your content. Then UPDATE to save your changes.
SHOW/HIDE ON MOBILE
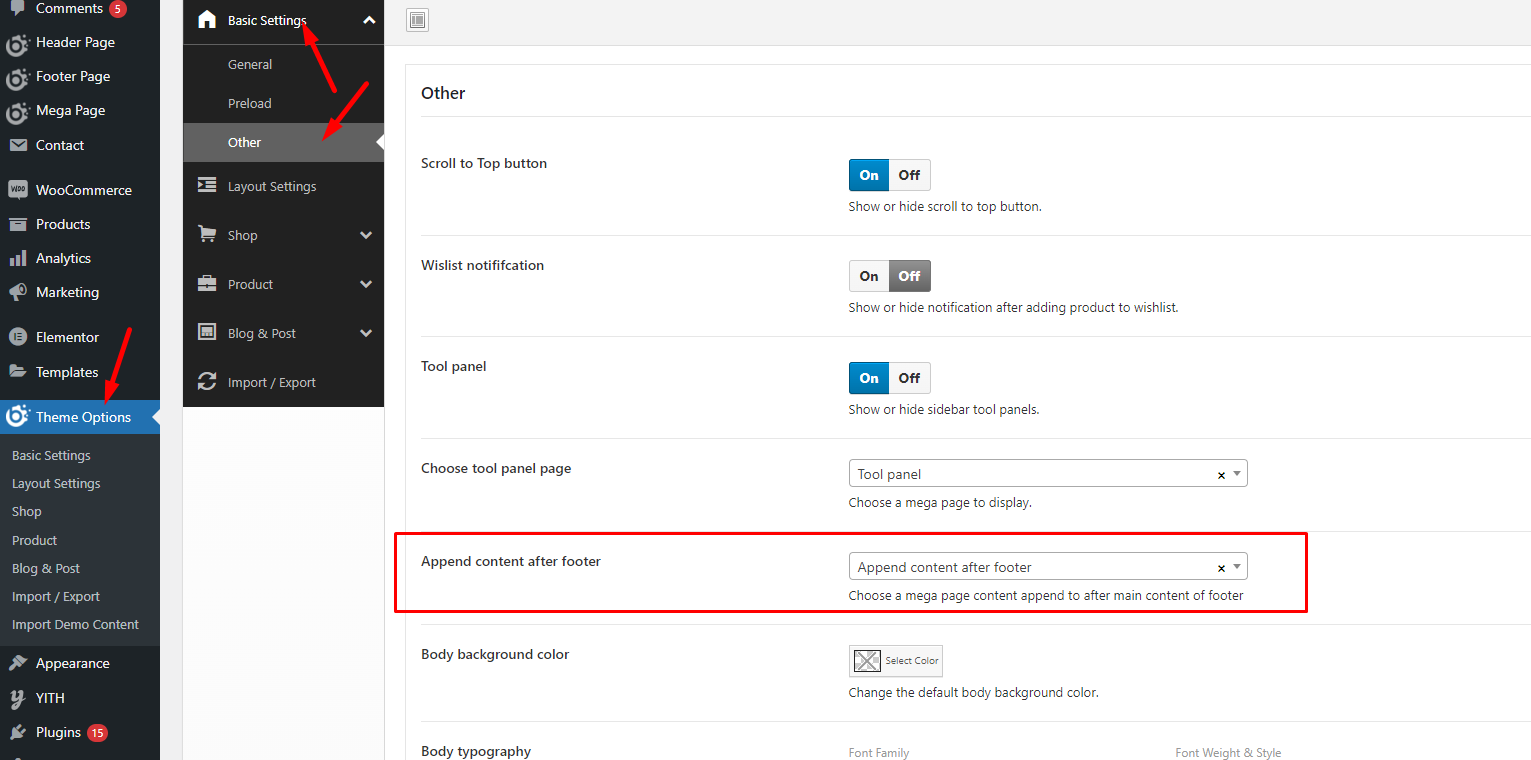
To show or hide footer menu on mobile, in Admin Dashboard, go to Theme Options -> Basic Settings -> Other -> Append content after footer and select or remove the Append content after footer mega page. Then Save Changes to save your option.

GLOBLE SETTINGS
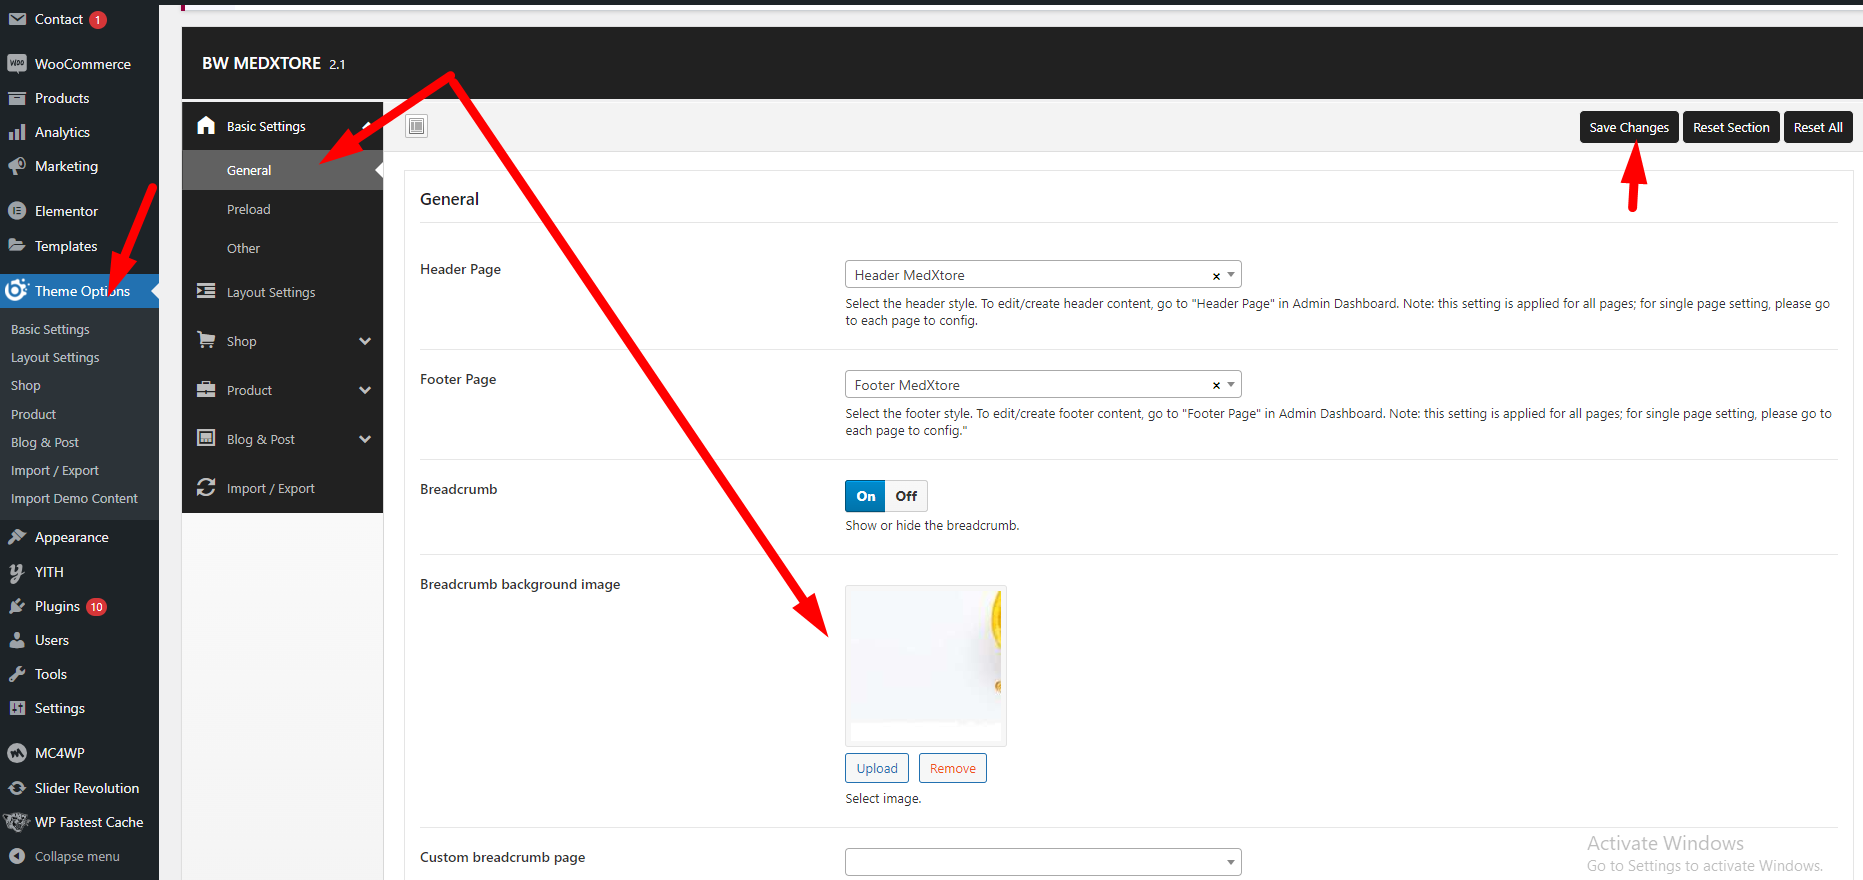
Go to Theme Options -> Basic Settings -> General -> Breadcrumb
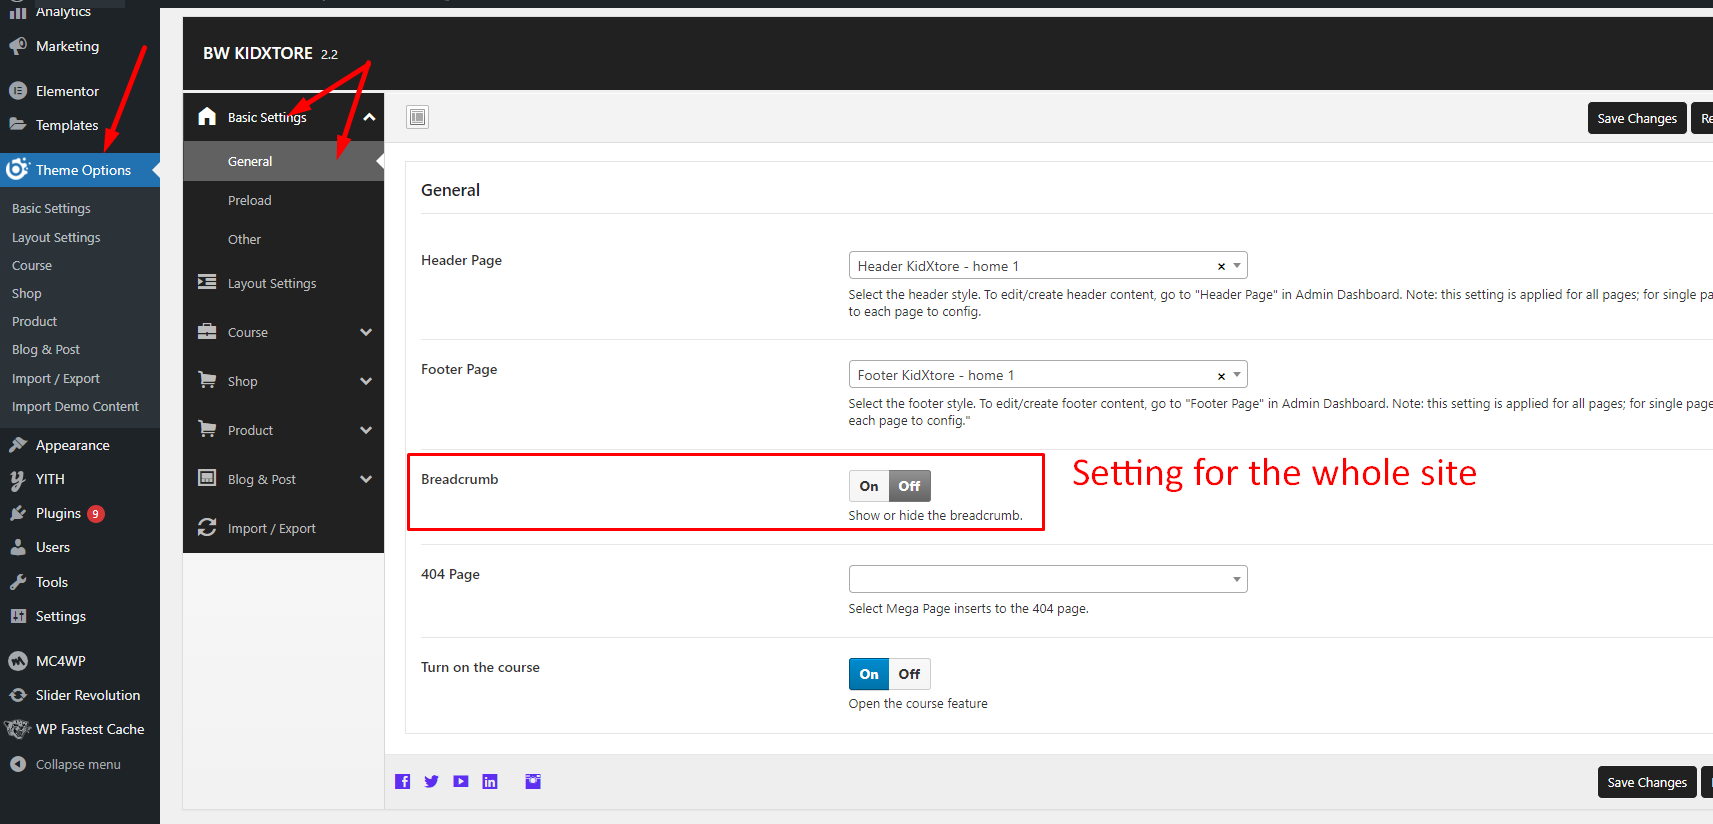
This setting is applied to the all pages including product pages, blog pages. If this option is turned on, please check settings on other sections and turn it off.
SHOP PAGE
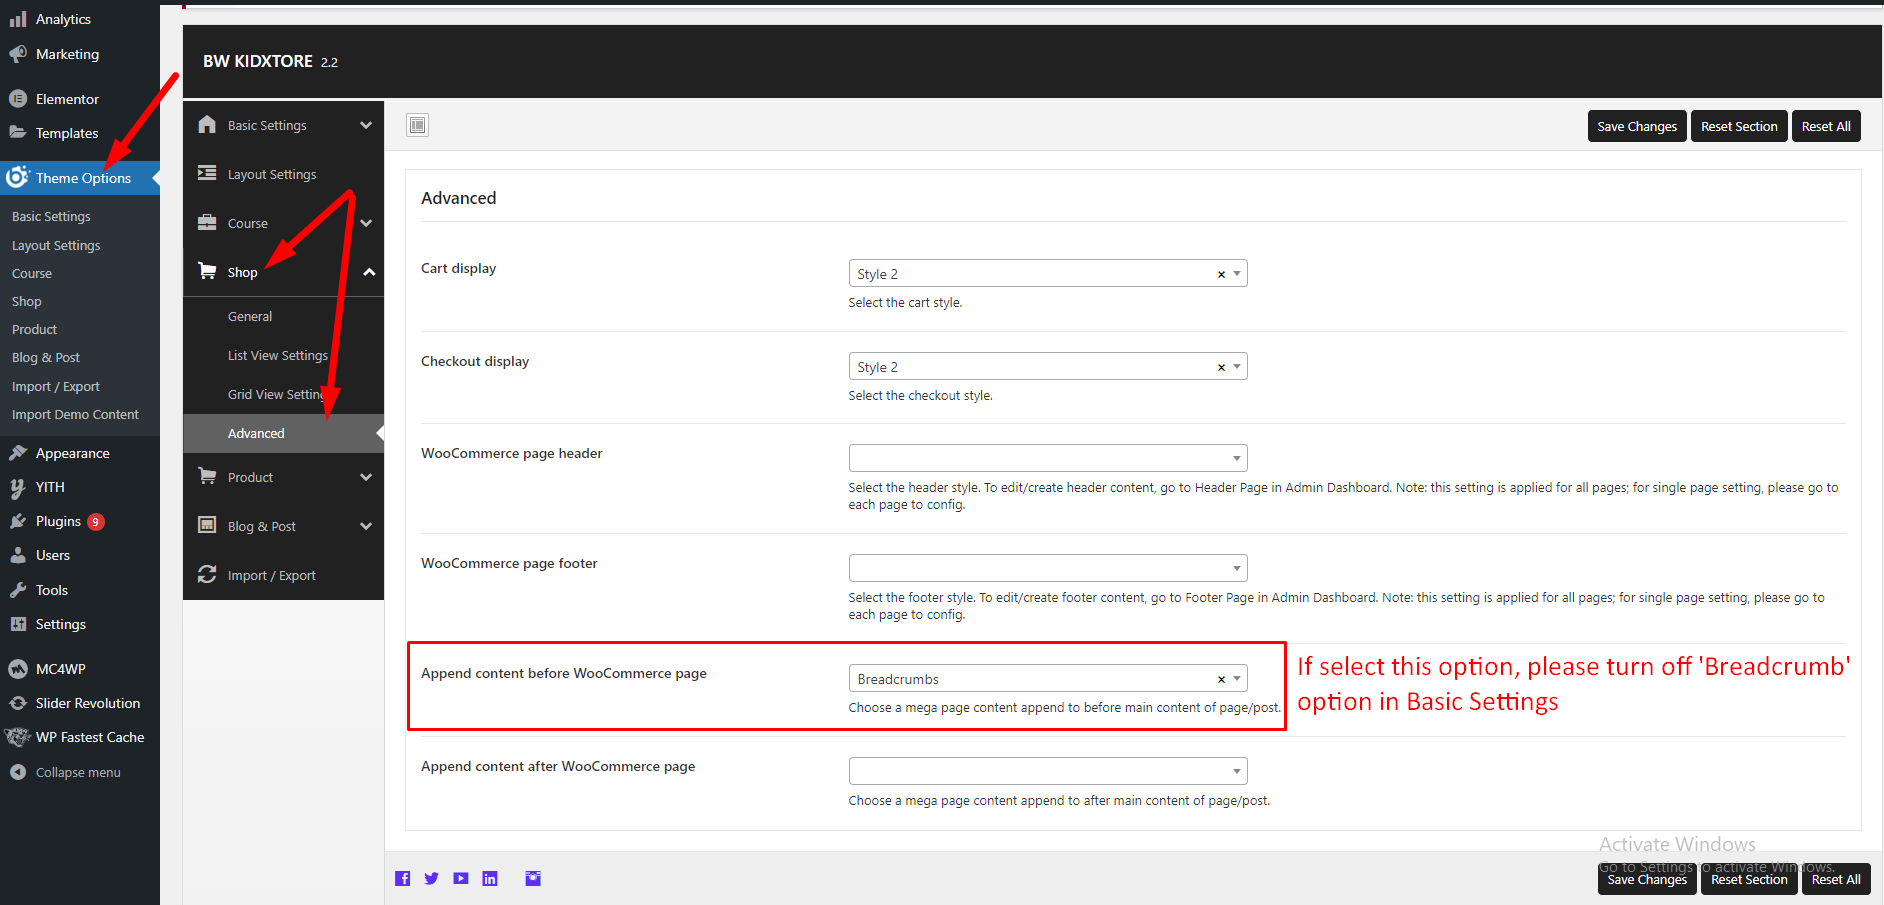
Go to Theme Options -> Shop -> Advanced-> Append content before WooCommerce page
If select this option, please turn off “Breadcrumb” option in Basic Settings
PRODUCT PAGE
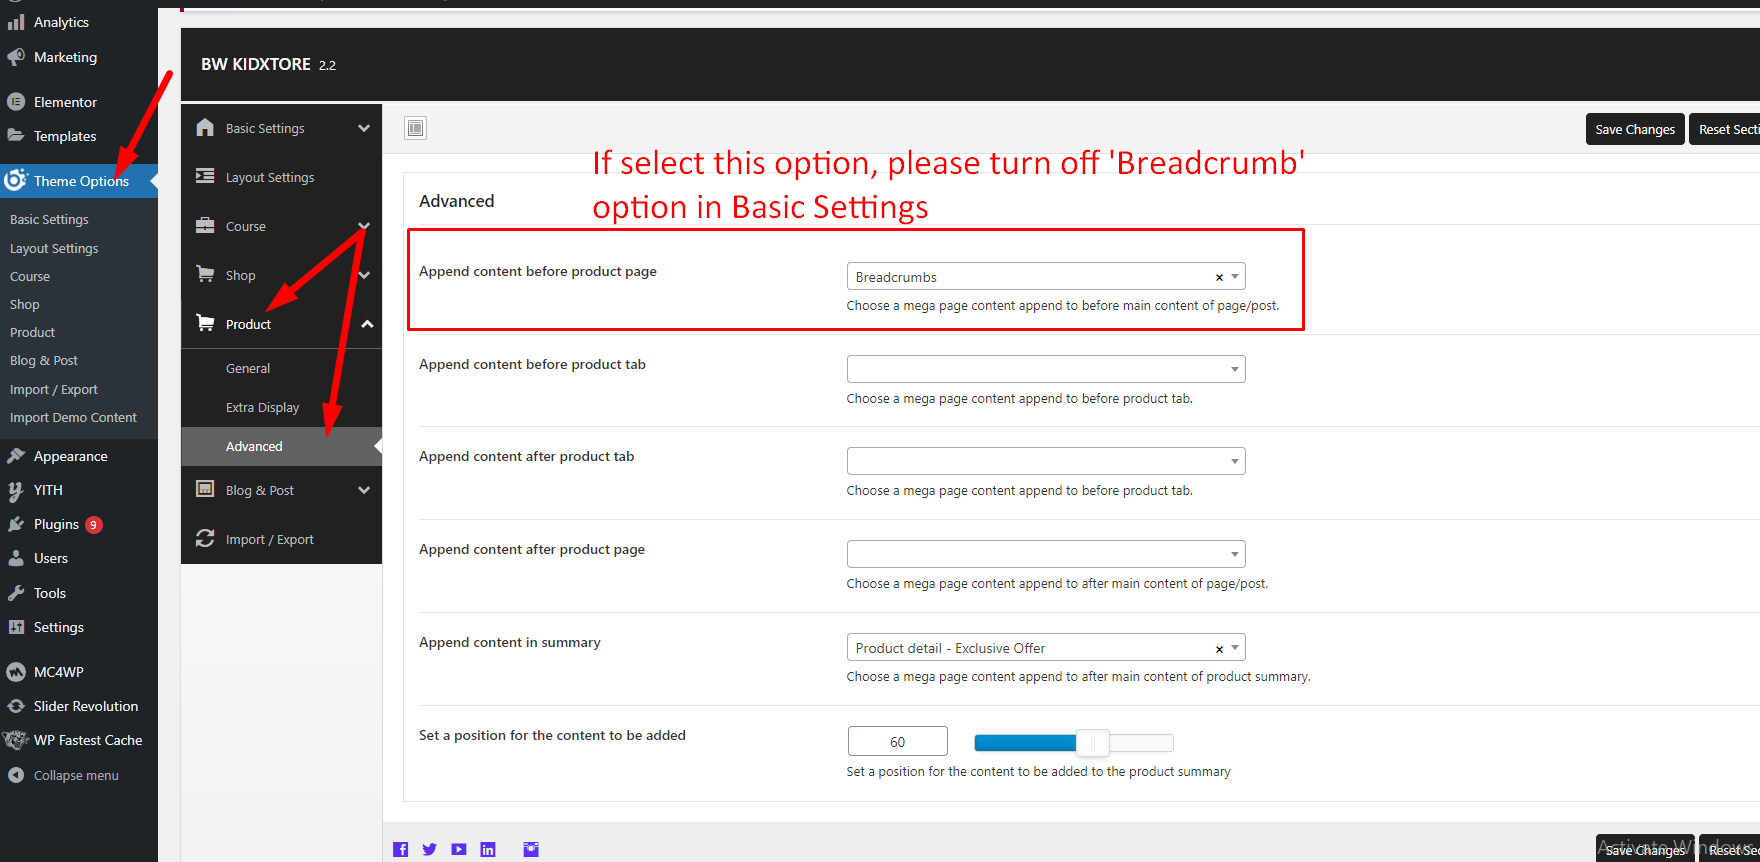
Go to Theme Options -> Product -> Advanced-> Append content before product page
If select this option, please turn off “Breadcrumb” option in Basic Settings
BLOG & POST PAGES
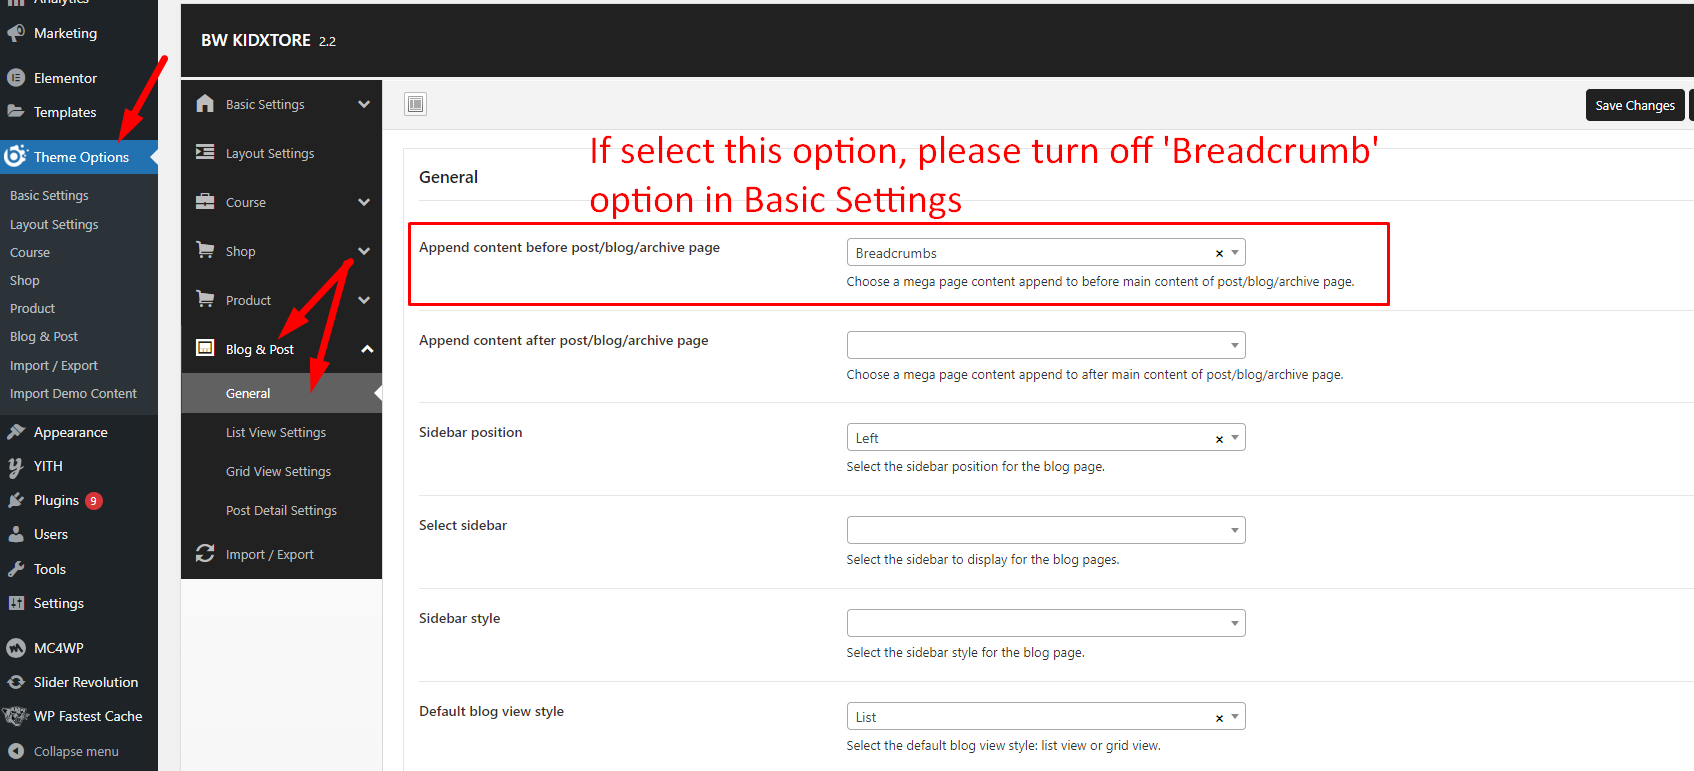
Go to Theme Options -> Shop -> Advanced-> Append content before WooCommerce page
If select this option, please turn off “Breadcrumb” option in Basic Settings
EDIT BREADCRUMB IMAGE
Medthod 1: Applied for MedXtore V1 (from demo 1 to 12)
Go to Theme Options -> Basic Settings -> General -> Breadcrumb background image
Method 2:
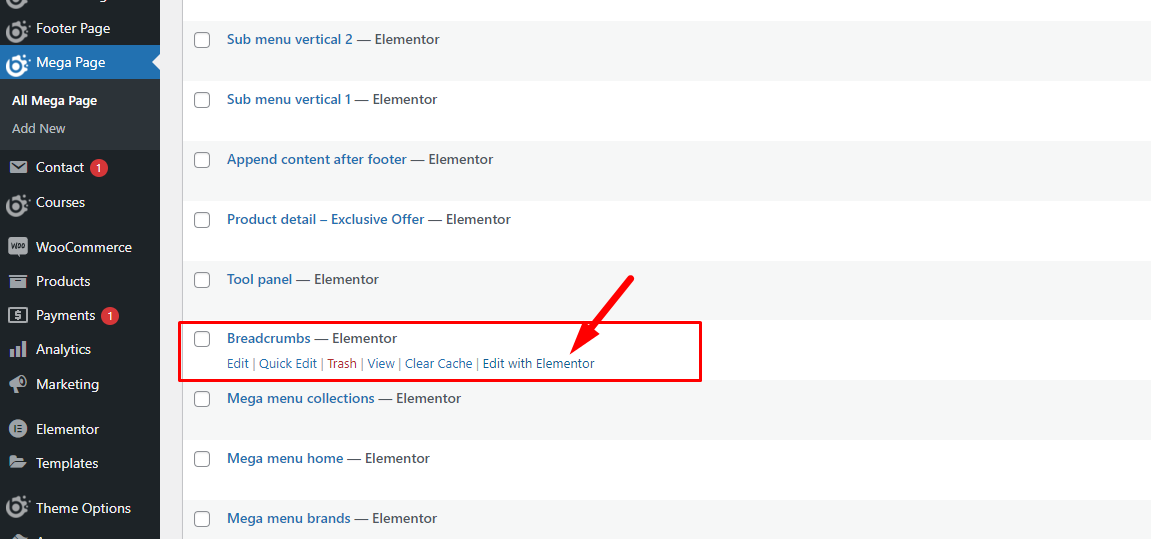
To edit breadcrumb image, in Admin Dashboard, go to Mega Pages -> Breadcrumbs -> Edit with Elementor and edit with your image. Then UPDATE to save your changes.
Our theme uses ‘FOX – Currency Switcher Professional for WooCommerce’ plugin for multi currencies.
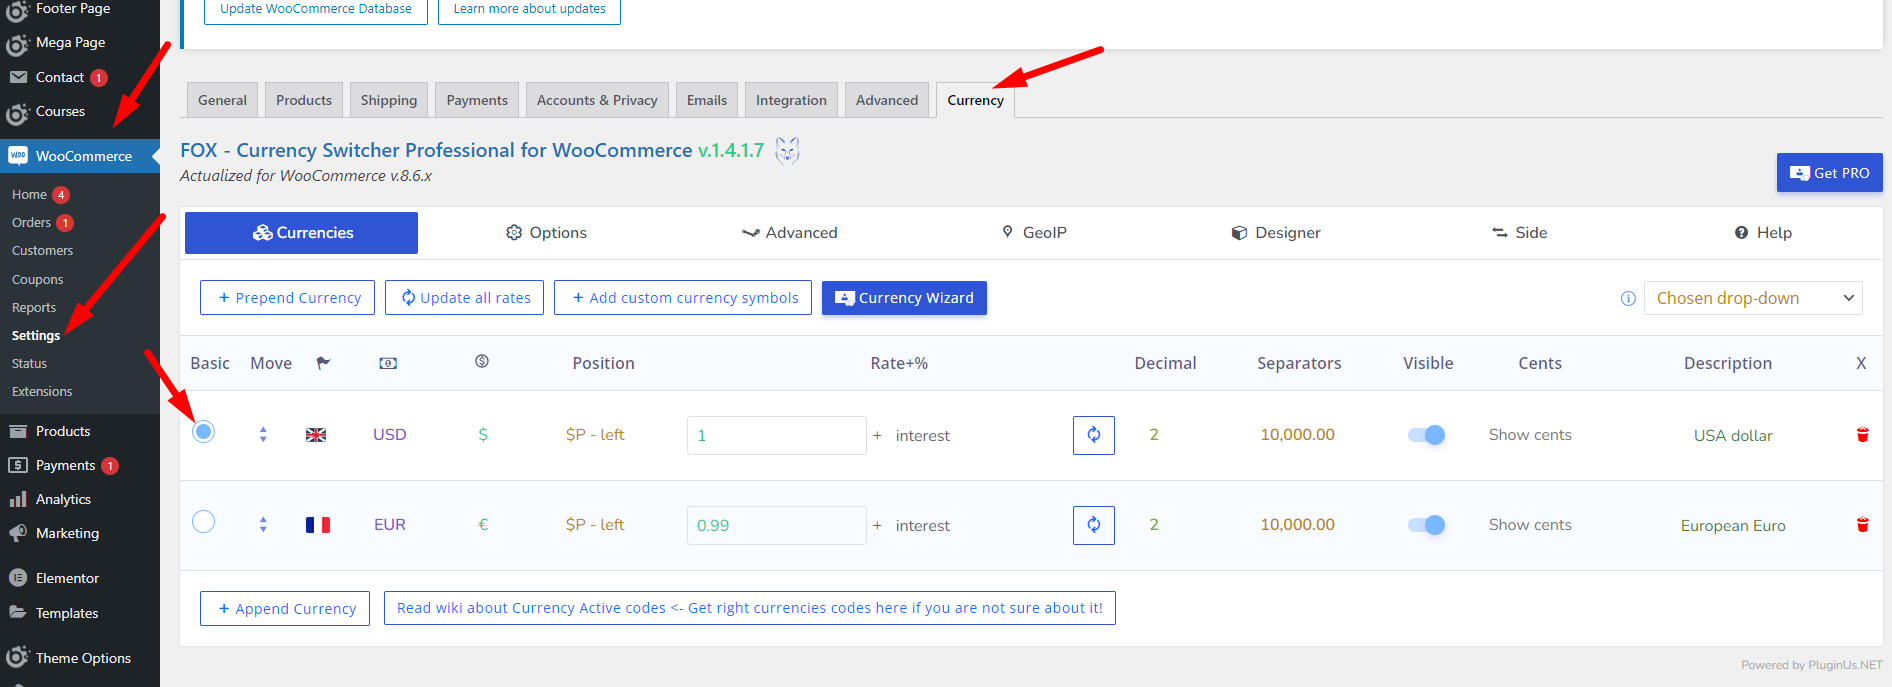
1. If your site using multi-currencies, you can select the primary currency:
In Admin Dashboard, go to WooCommerce -> Settings -> Currency, select your primary currency -> Save Changes
2. If your site has only 1 currency:
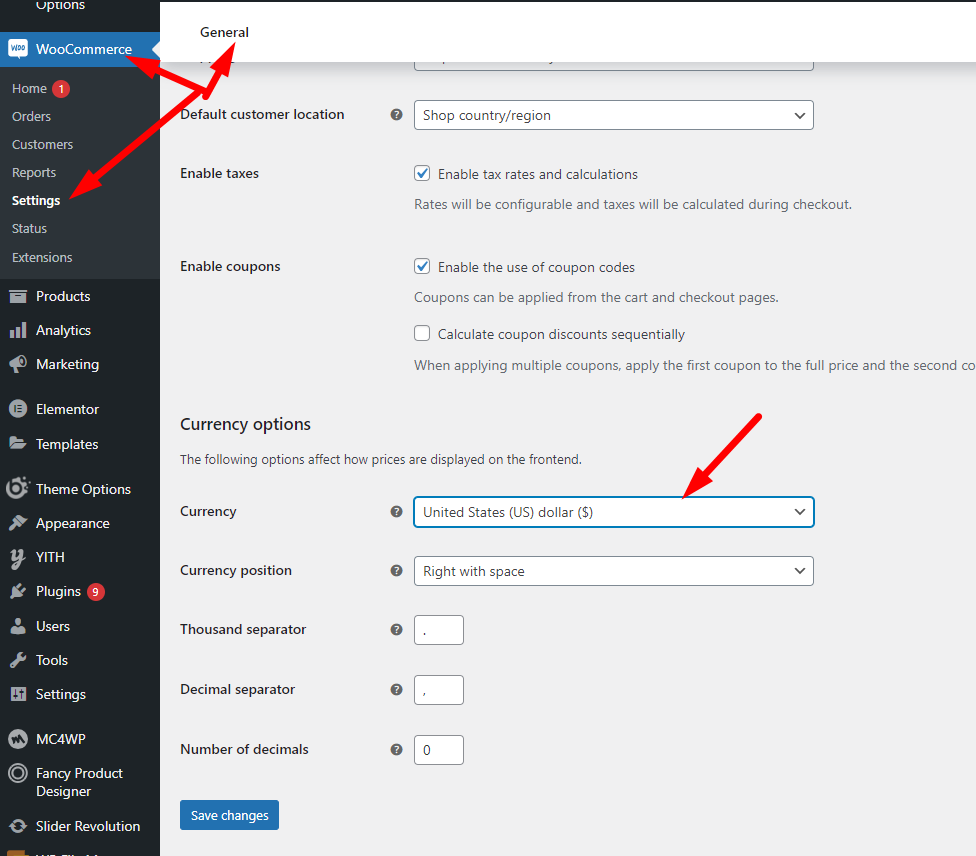
Firstly, deactivate ‘FOX – Currency Switcher Professional for WooCommerce’ plugin
Then, in Admin Dashboard, go to WooCommerce -> Settings -> General -> Currency Options , select your primary currency -> Save Changes
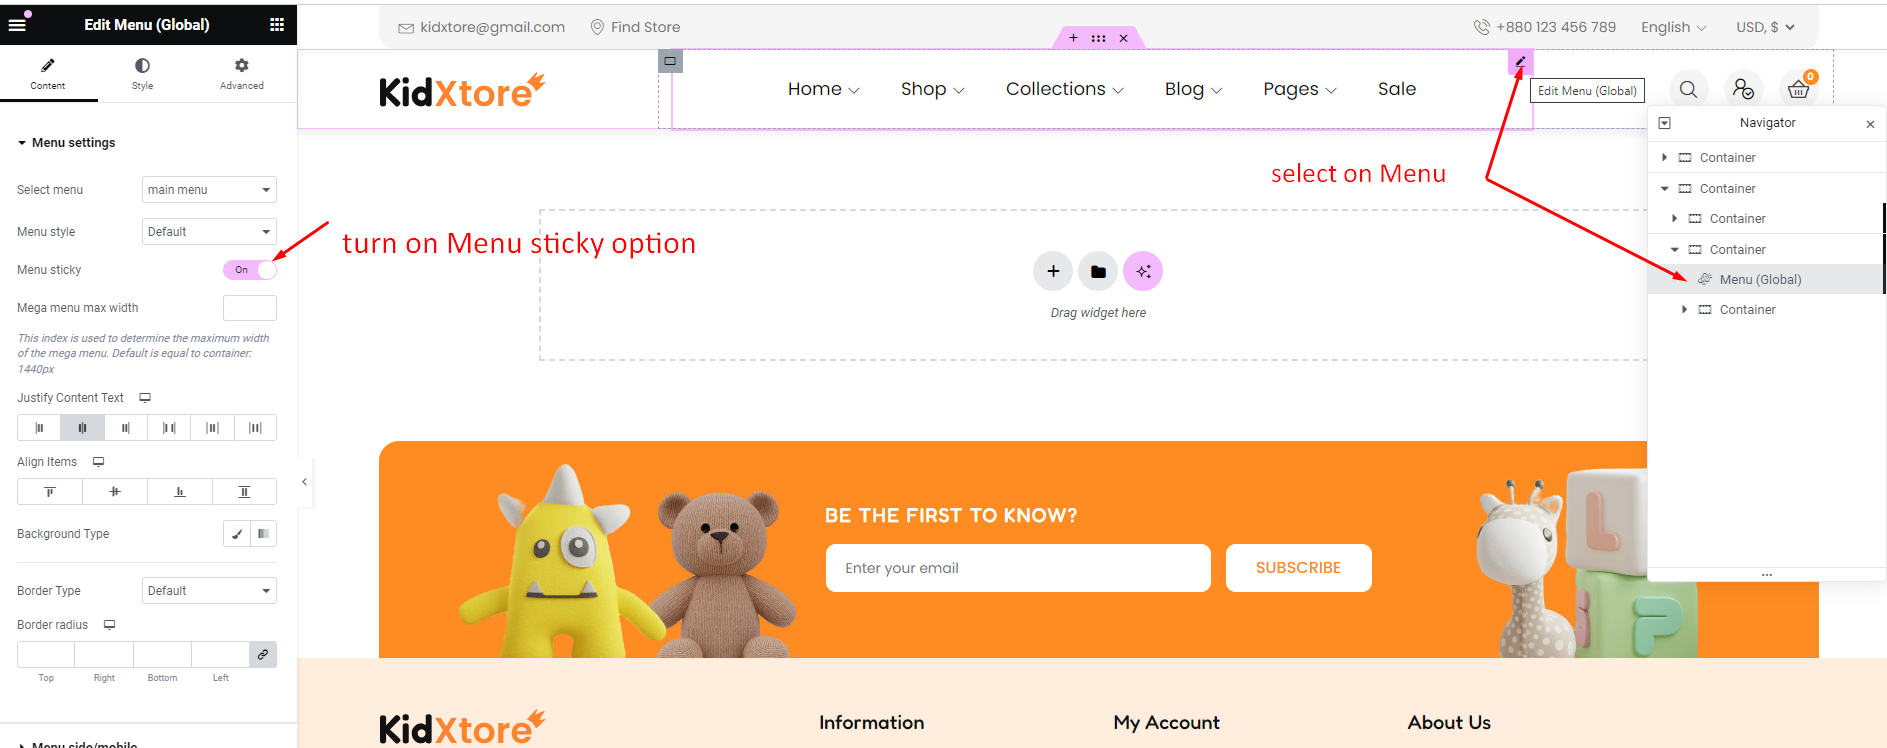
Login to Admin -> go to frontend -> Hover on Edit with Elementor -> Choose your header (Ex: Header KidXtore - home 1)
Click to select Menu -> Enable ‘Menu sticky’ option -> Update to save
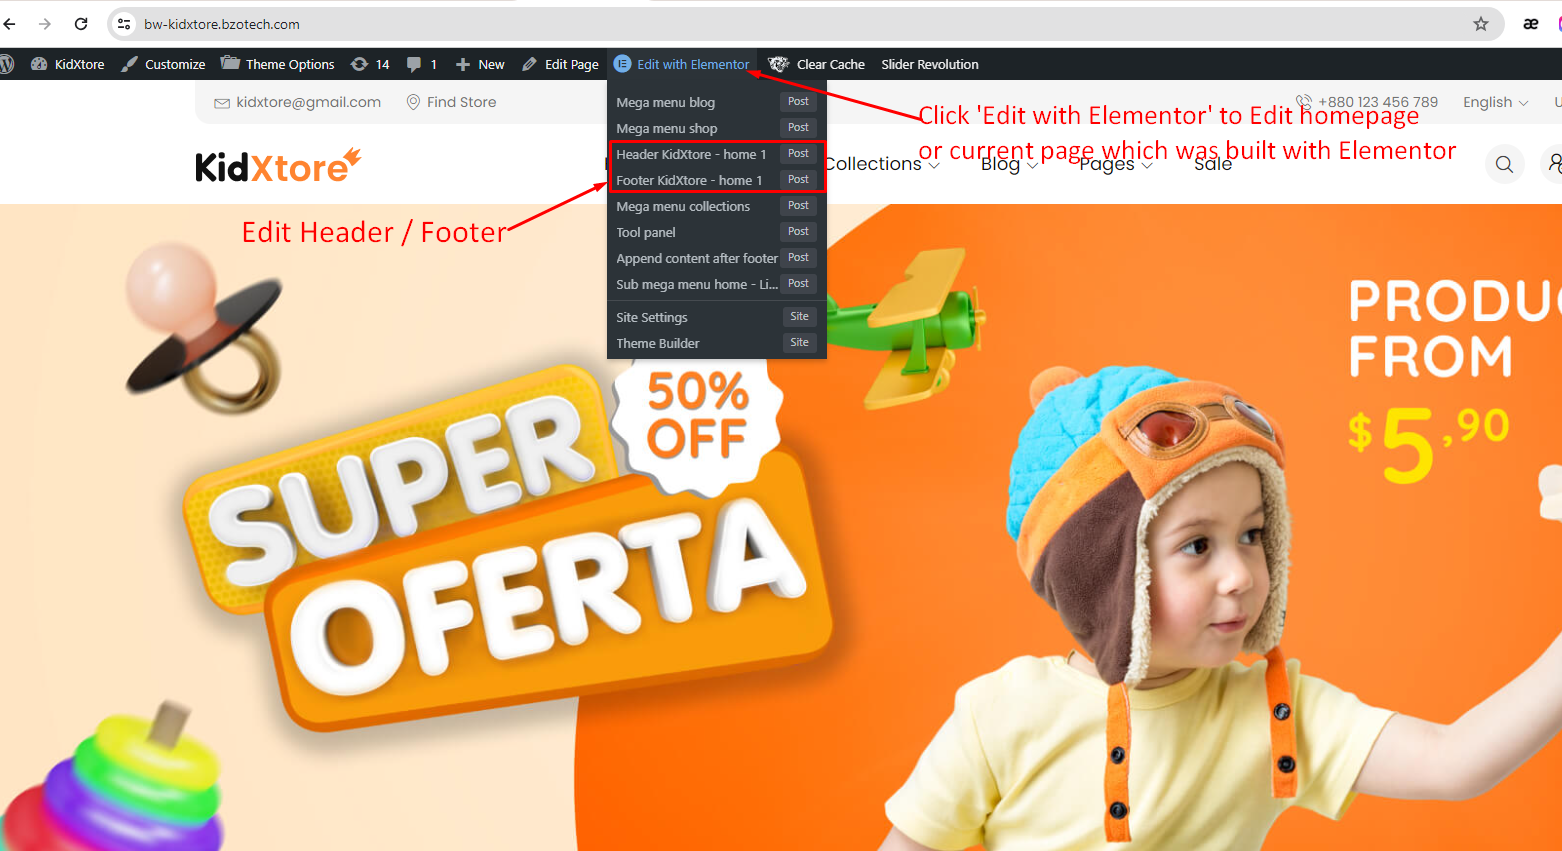
Login to Admin -> go to homepage frontend (or page built with Elementor that you want to edit with) -> Hover on Edit with Elementor-> Edit with Elementor: Edit homepage/current page with Elementor (the page must be built with Elementor)
-> Header KidXtore - home 1: Edit header with Elementor
-> Footer KidXtore - home 1: Edit footer with Elementor
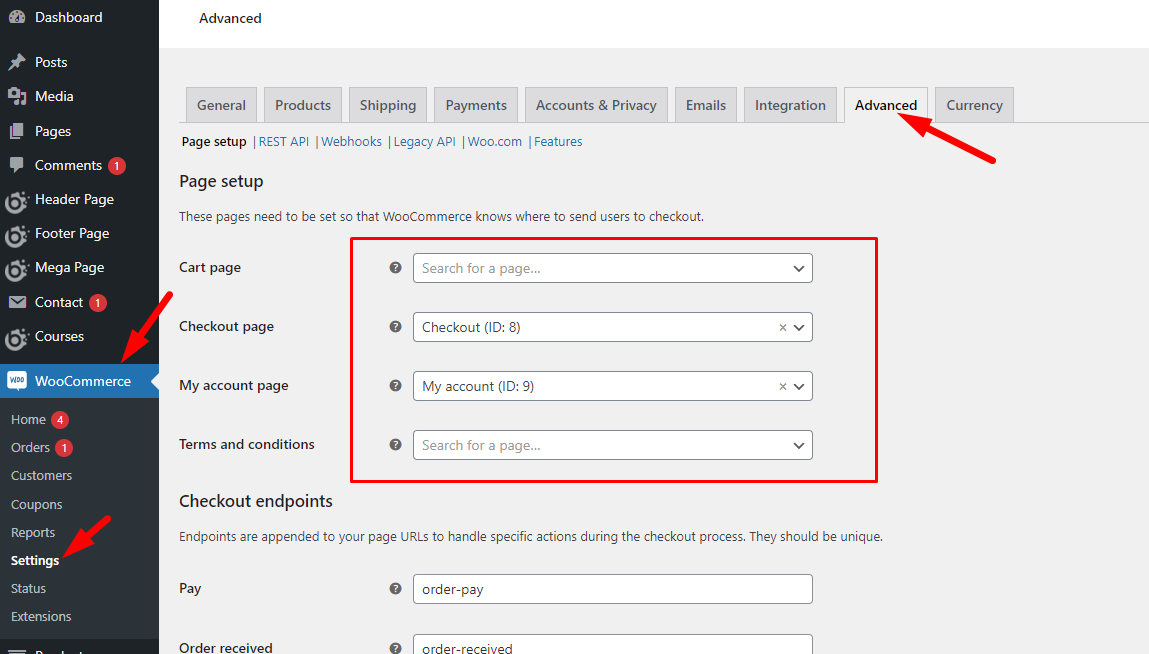
To tell WooCommerce what pages to use for Cart, Checkout, My Account, and Terms and Conditions, go to WooCommerce > Settings > Advanced.
To tell WooCommerce what pages to use for the Shop page go to WooCommerce > Settings > Products.
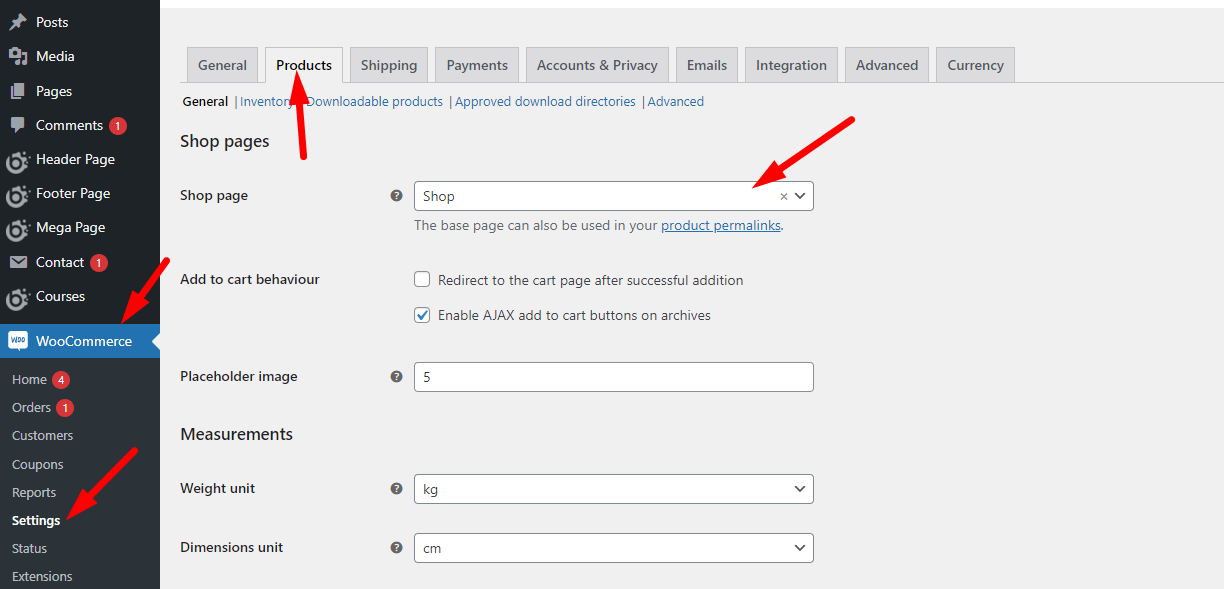
Admin > Pages > Edit > Page settings > General Settings > Sidebar position > No Sidebar > Update

You may like
Responsive Eye Glasses WordPress WooCommerce Theme

Responsive Sunglasses WooCommerce WordPress Theme
Responsive Eye Glasses Store WooCommerce WordPress Theme
Responsive Eyeglasses WordPress WooCommerce Theme
Responsive Glasses Store WooCommerce Theme WordPress


