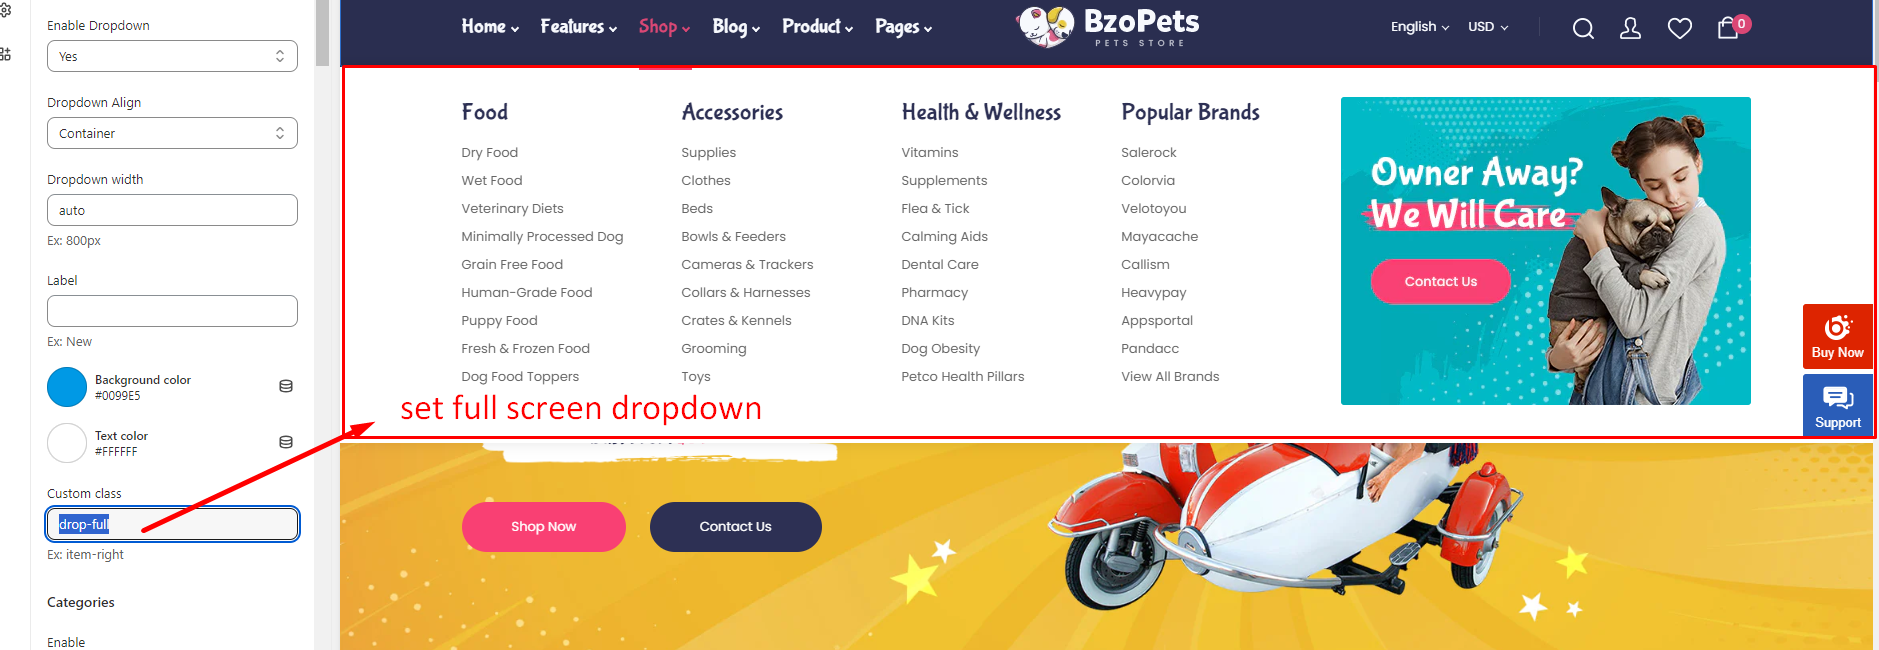
1. GETTING STARTED
We would like to thank you for purchasing BzoPets Shopify Theme. BzoPets theme is extremely effective and ideal for any animals and pet shop Shopify projects. Wonderful theme with excellent user experience.
Before you begin, please be sure to go over this material. We layout a lot of useful information and provide you all the information you need to utilize the BzoPets Theme.
If you can’t find your solution in our documentation, please contact us via the support page. We are delighted to assist you, and you will receive a response from us much sooner than you anticipated. We hope you enjoy it!
2. SHOPIFY BACKGROUND KNOWLEDGE
 Read shopify manual before you start
3. INSTALLATION
Before installing, you should purchase BzoPets template from Themeforest, then extract the Package that include all files and folders of theme.
Find the file:bzopets_1.0.0.zip in the folder Theme, it’s the file that you need to upload to your Shopify store.
3.1. Theme Installation
Installation video guide
Look at this video of installation process:
Install the theme:
- Please log in to your Shopify store, click Online Store, then click Themes.

- From there, click Upload a theme on the top right-hand corner.
- The Upload A Theme dialog displays. Click Choose File to select the .zip file you want to upload, then click Upload.
- If your store is currently active and is using a different theme, you can select Publish theme button to publish what you have just uploaded to be an active theme.
3.2. Install Apps
1. Set Product Review
To have product review feature, you can install this free app below:
4. STORE SETTING
PLEASE FOLLOW THESE CONFIGURATIONS TO CONFIG YOUR STORE
4.1. Currency (General)
Editing the HTML for currency formatting
-
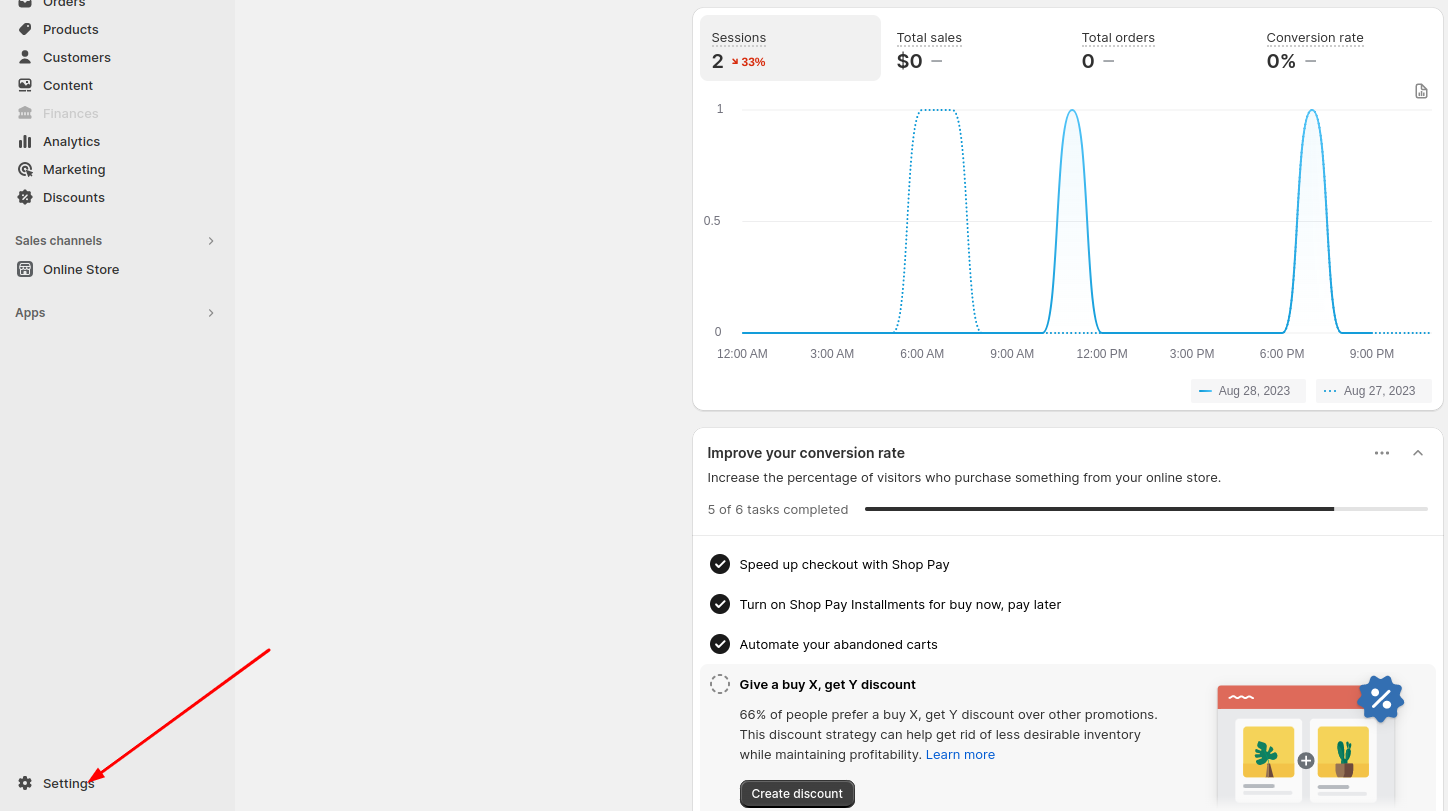
- From your Shopify admin, click Settings => Scroll down to Select setting General => change formatting to open the Currency Formatting section:
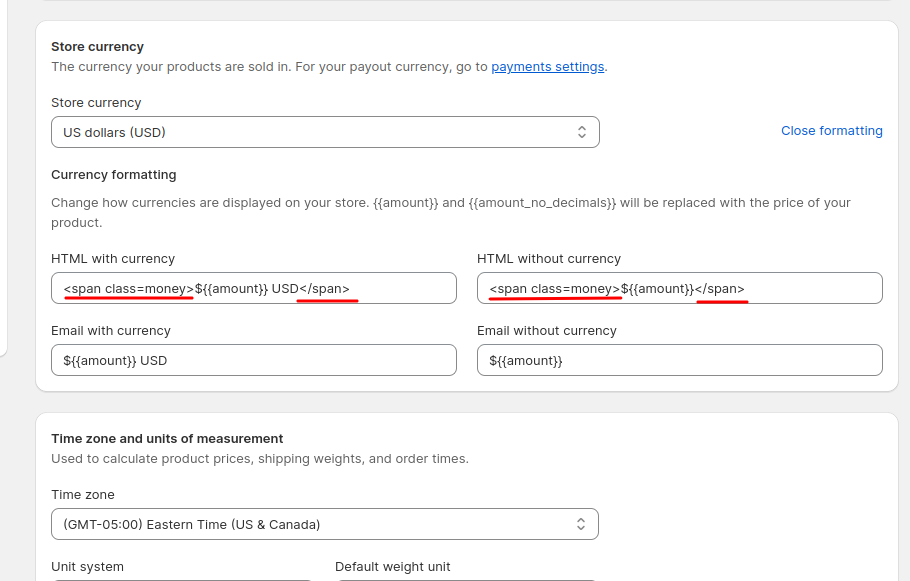
- Set up HTML with currency and HTML without currency as below and click Save
- From your Shopify admin, click Settings => Scroll down to Select setting General => change formatting to open the Currency Formatting section:
4.2. Payments
1. From your shop admin, go to the Settings / Payments
2. Choose a payment gateway to accept payments for orders. The checkout page is working.
4.3. Checkout
- From your Shopify admin, click Settings => Checkout => Scroll down to the Customer accounts section.
- Check Accounts are optional and click Save.
4.4. Shipping
To enable shipping calculator, please configure your shipping rates by following below guide:
5. PAGES SETUP
You will also need to create two pages, one for the textual content that can be placed on the ‘ Frontpage ‘ as a welcome message and another for the ‘ Contact Page ‘ which you can link to the ‘page.contact’ template. Linking these pages to the correct template will be covered in their respective sections within this documentation. Here is the link which help you to create custom pages.
If you are having difficulty in finding complimentary colors to use throughout your customization, we recommend using an advanced color wheel/palette such as Adobe Kuler.
5.1. Create Contact Us Page
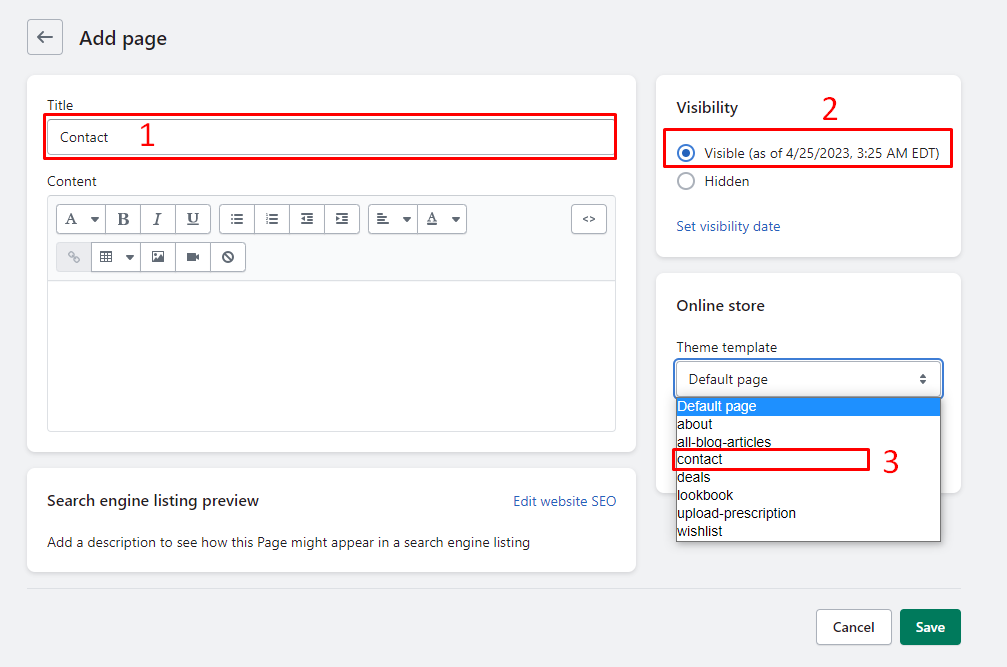
Login to your Shopify admin panel and go to Pages, click Add page:
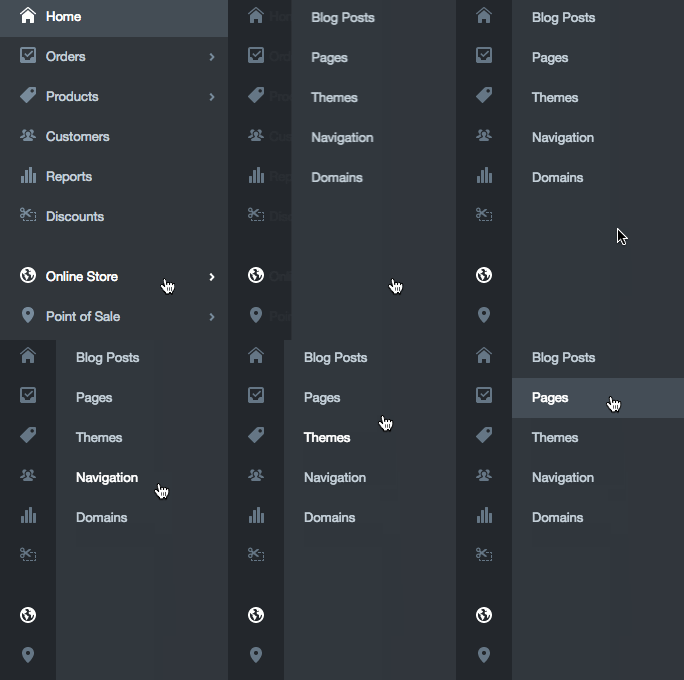
1. In the Online Store / Pages, find and click button “Add page”

2. Write in the Title field page name => Select Visible => Select Template: page.contact => Click save
SETTING CUSTOMIZE
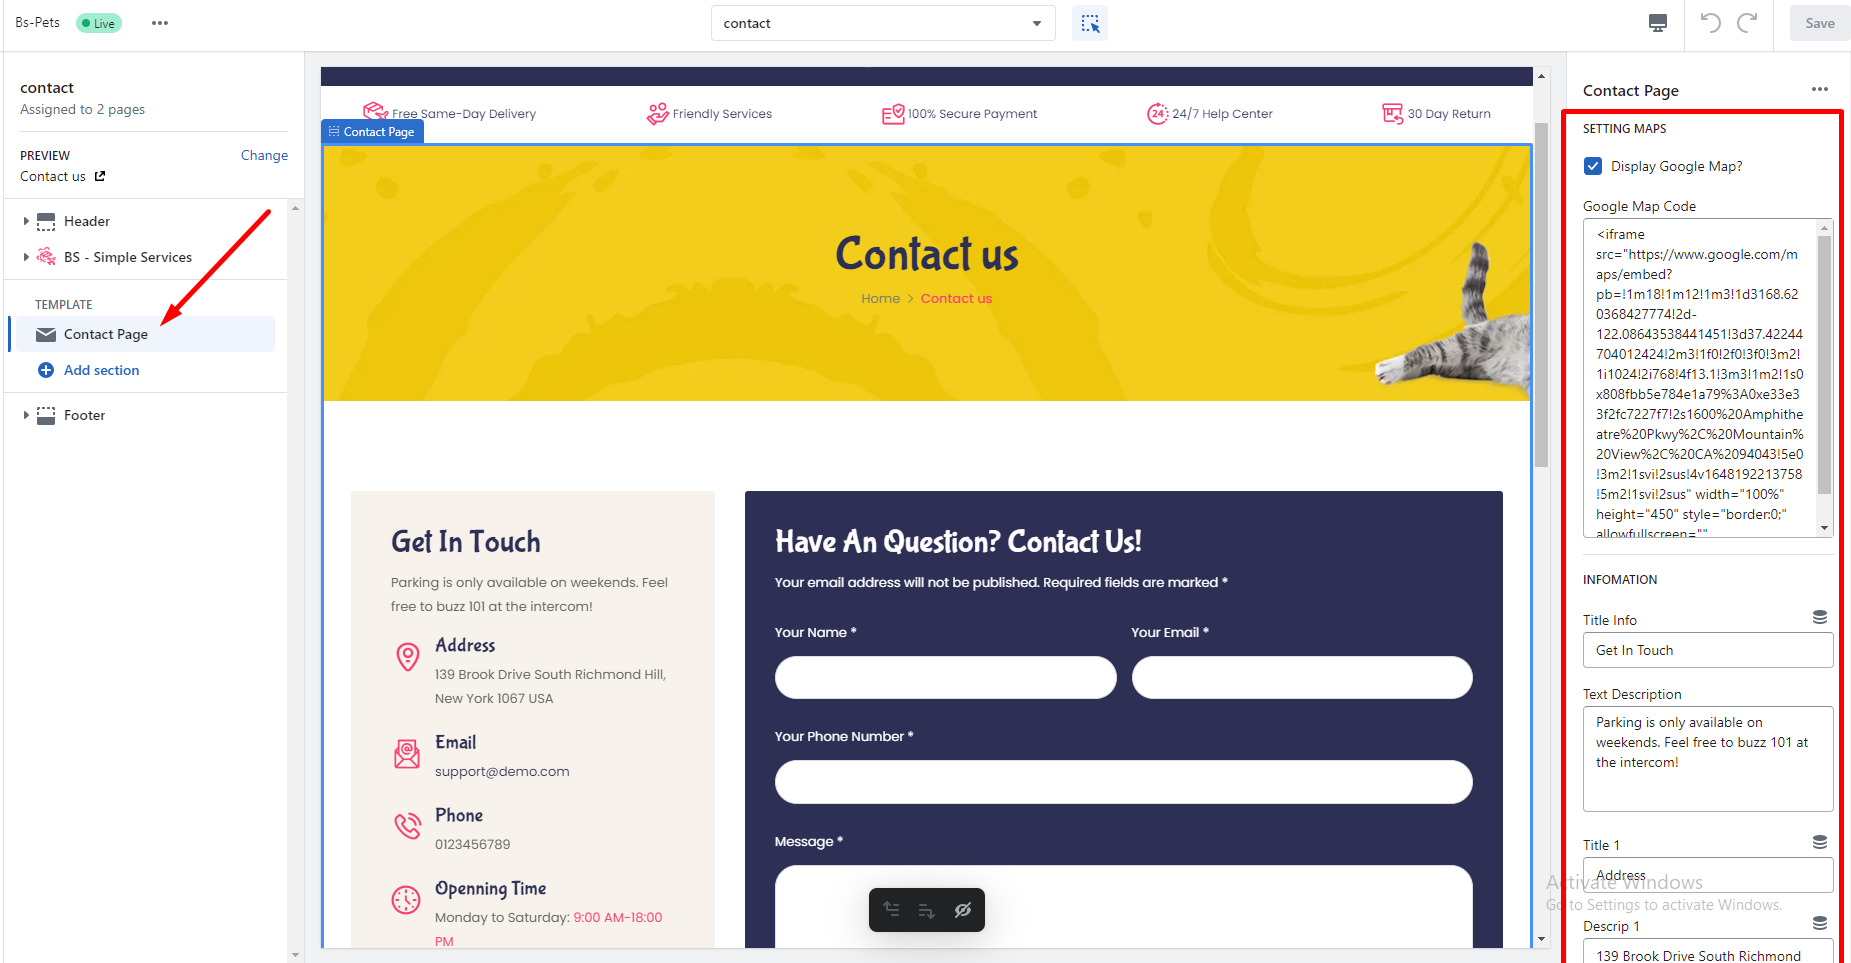
After you create Contact Us page successfully, please go to Themes > Customize > Click Contact us which you just created at navigation to show Section for this.
Then, paste the embedded code of Google Map into the field Google Map Code and put the content that you’d like to show as the below image.
EDIT/ADD FIELDS TO THE CONTACT FORM
This is the contact form we are going to add/ edit:

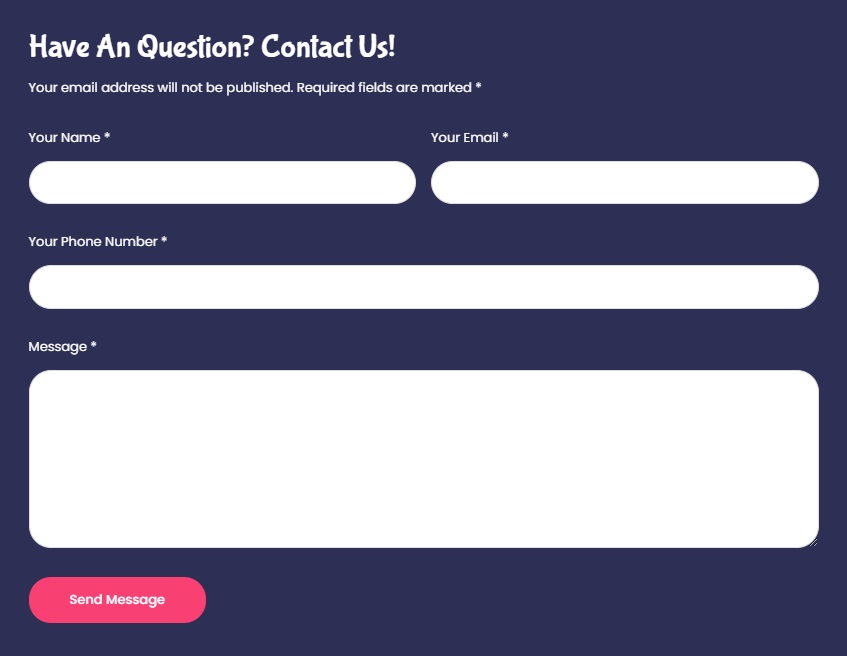
To add/edit contact field, please follow below guide:
5.2. Create Wishlist Page
1. From the pages tab, click the Add page, then click page.
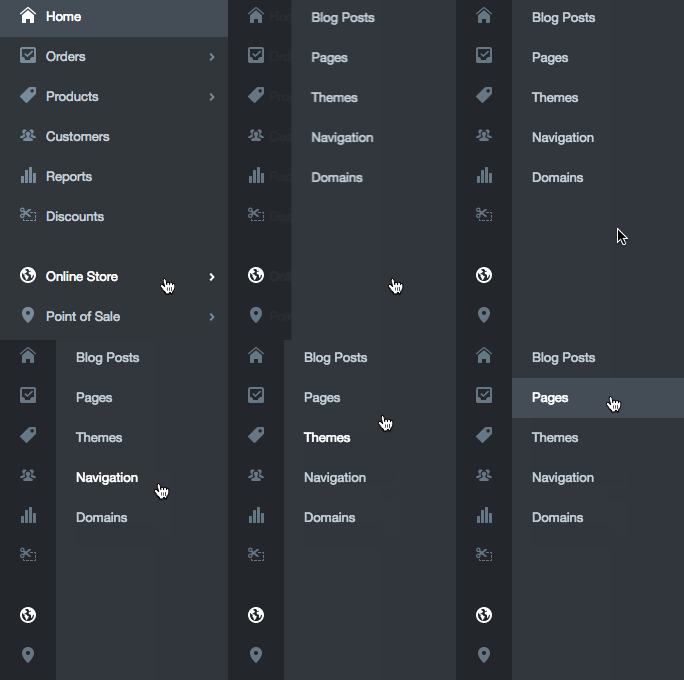
2. From your Shopify admin, click Online Store button. You will be taken to a new template page.

3. From the template page, enter a Title and choose the Template look like the below image.
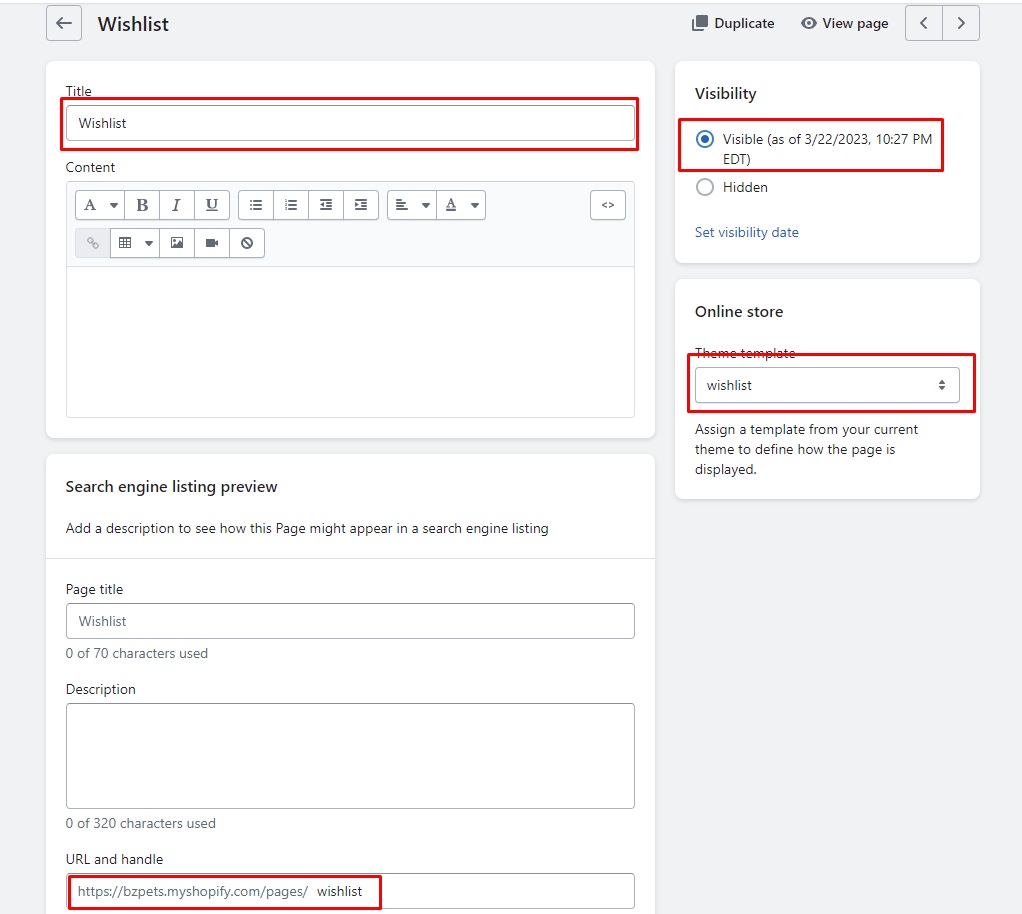
4. Click Save.
5.3. Create About Us Page
1. From the pages tab, click the Add page, then click page.
2. From your Shopify admin, click Online Store button. You will be taken to a new template page.

3. From the template page, enter a Title and choose the Template look like the below image.
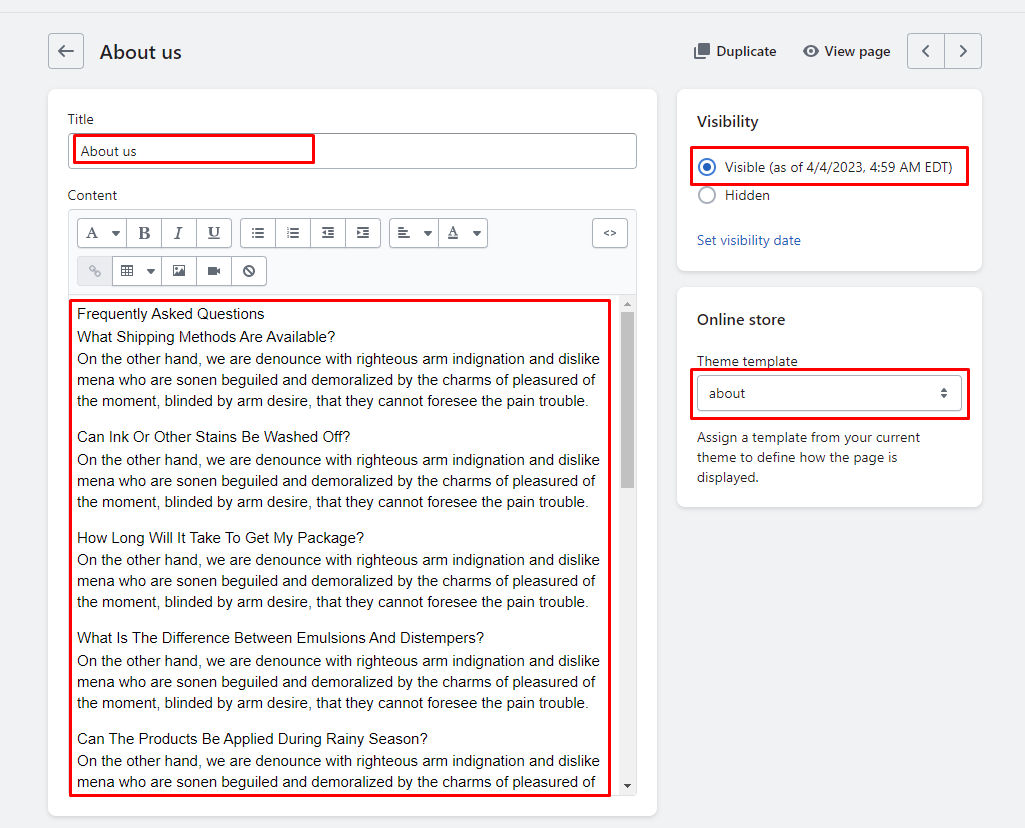
4. Click Save.
5. From your Shopify admin, click Online Store, then click Themes. Click Customize theme for the theme you want to customize. In General Settings Tab -> About Us Page.
– Backend setting:
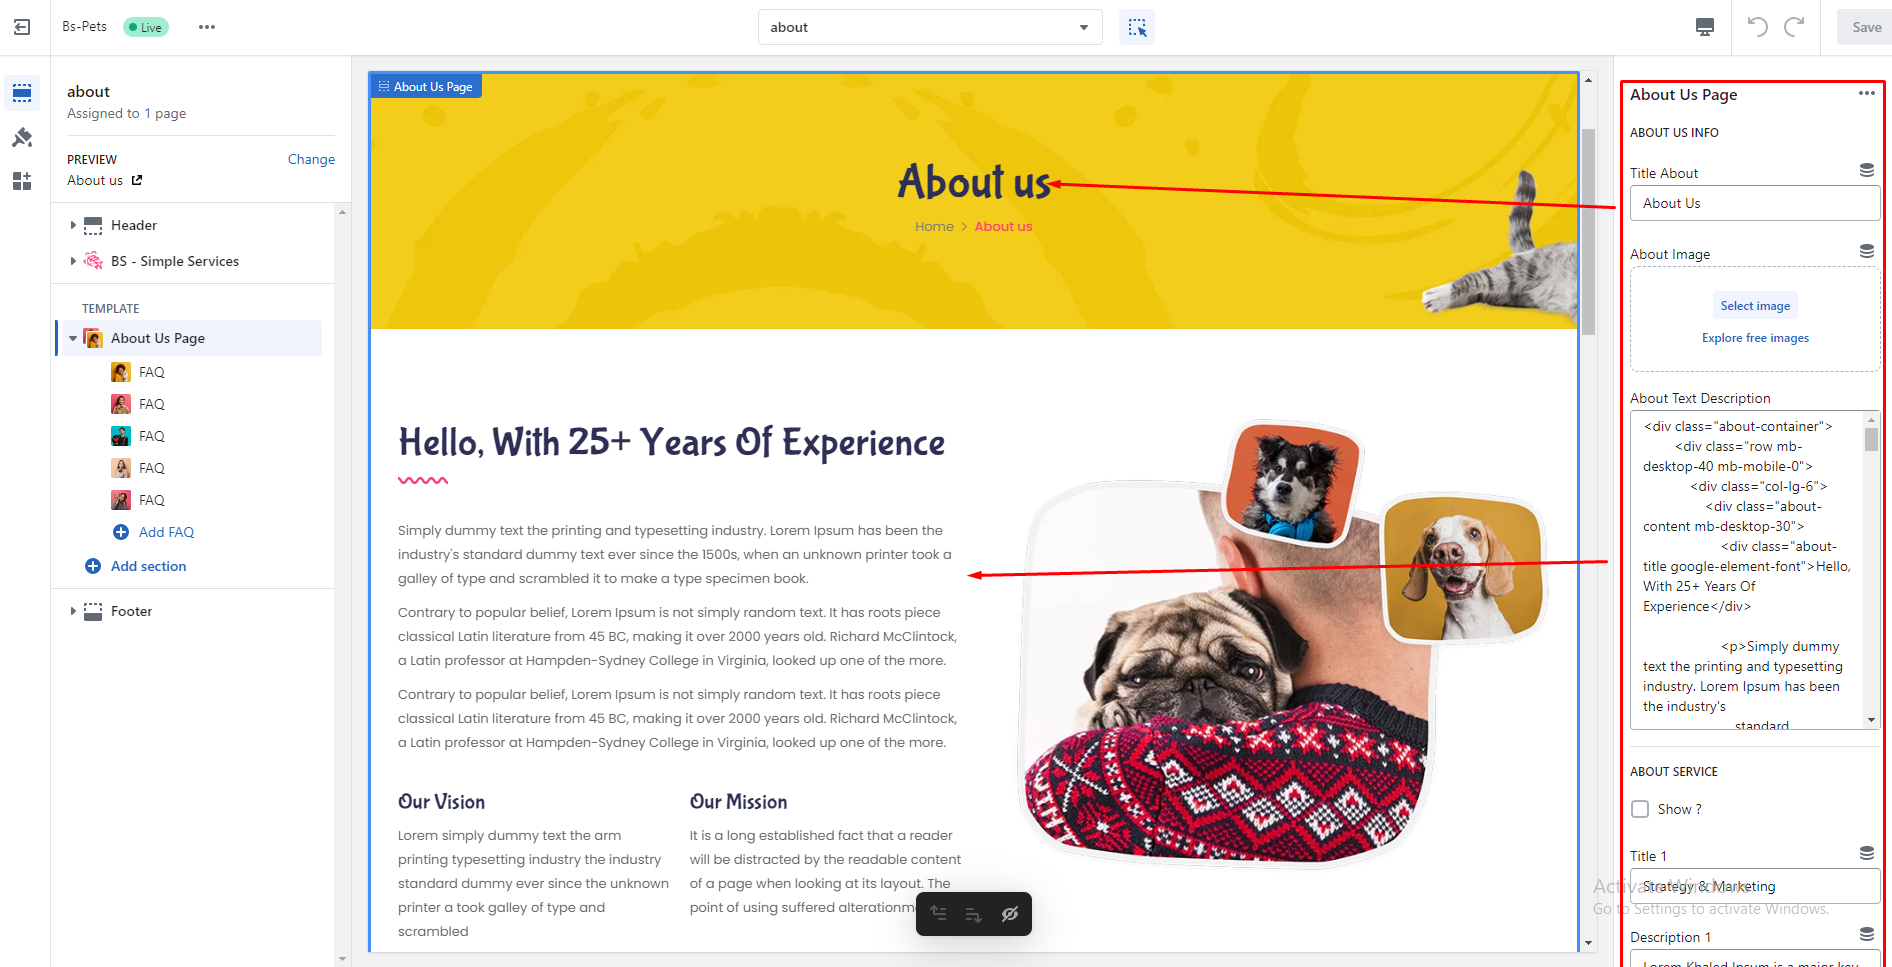
5.4. Create FAQs Page
1. From the pages tab, click the Add page, then click page.
2. From your Shopify admin, click Online Store button. You will be taken to a new template page.

3. From the template page, enter a Title and choose the Template look like the below image.
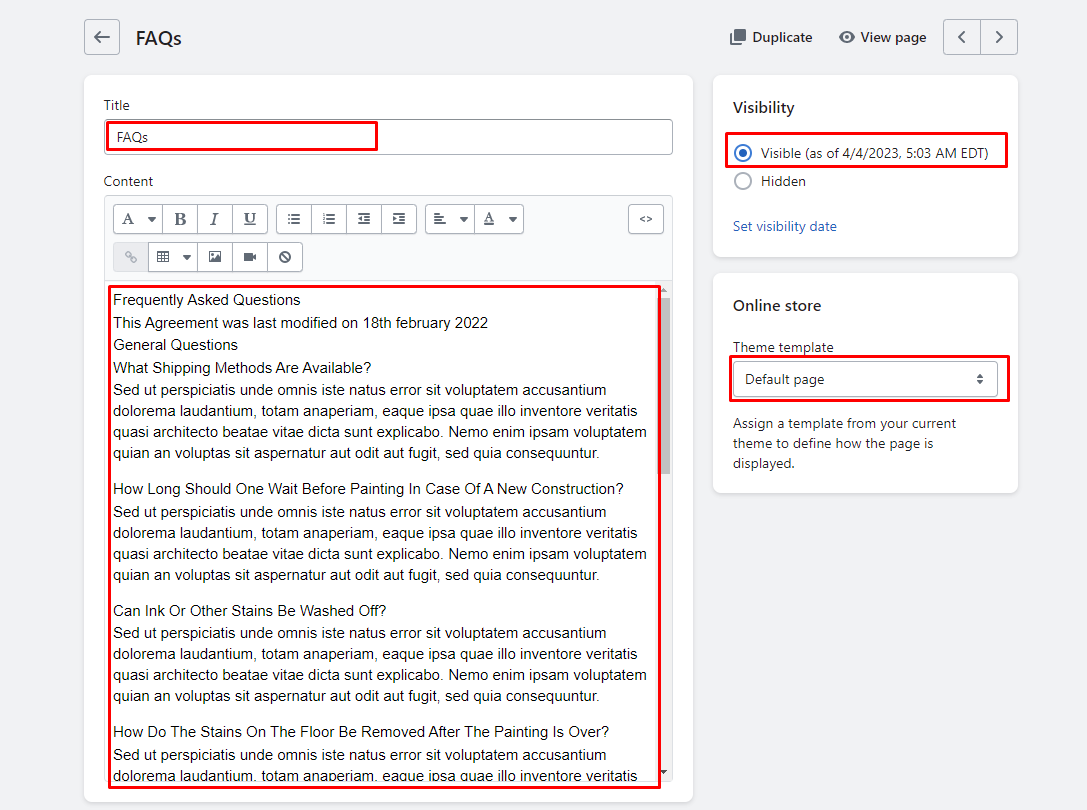
4. Click Save.
7. CREATE BLOG
Link setup guide blog Blog Posts Manual
8. SETUP PRODUCT FILTER
Before you start you must read shopify manual:1.Products
8.1. Add Category Filter Product
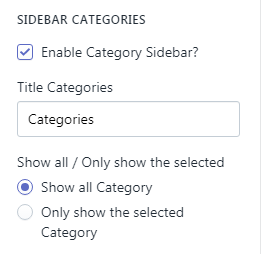
Filter category work with tags. You need write product category in product tags field.

It work for all products in the collection
8.2. Add Variants Product
Filters work with tags. You need write category, size, color, vendor, price, tags in product tags field. After that you must write all unique tags in customize theme

8.3. Add Color Filter Tags
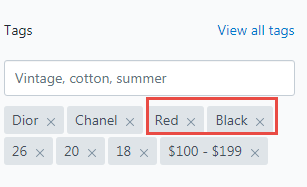
Filter color work with tags. You need write product colors in product tags field.
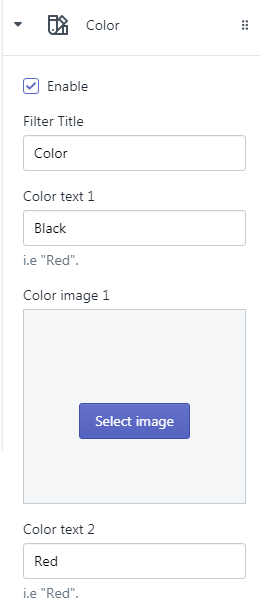
After that you go to the theme editor. In the field “List Colors” you write all color in collections
8.4. Add Size Filter Tags
Filter size work with tags. You need write product sizes in product tags field.
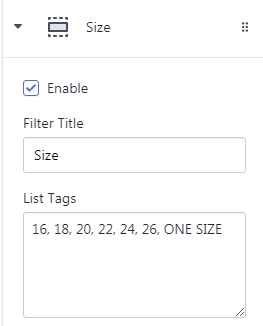
After that you go to the theme editor. In the field “List Sizes” you write all prices in collections
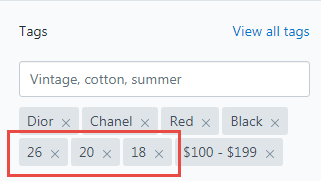
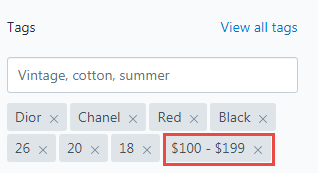
8.5. Add Price Filter Tags
Filter price work with tags. You need to write product price category in product tags field.
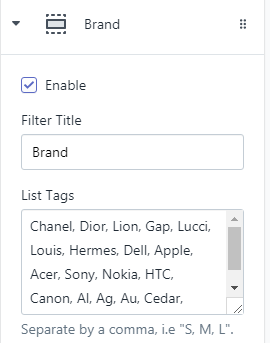
After that you go to the theme editor. In the field “List Sizes” you write all prices in collections
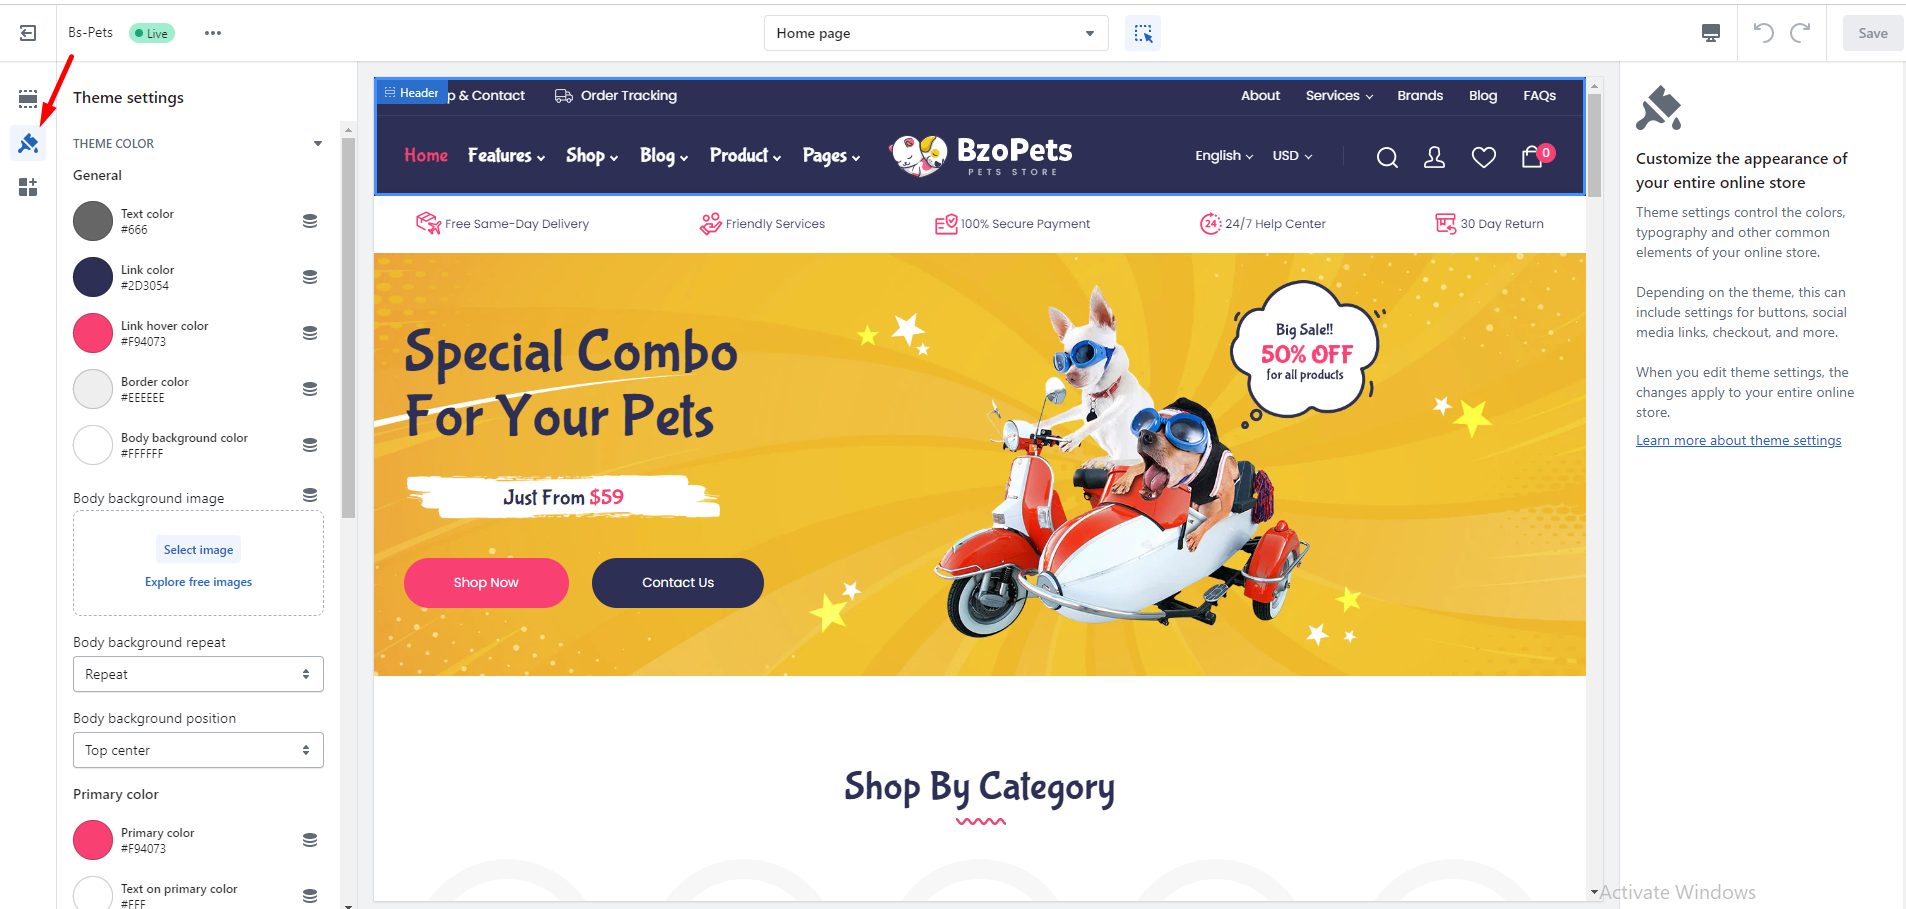
9. THEME SETTINGS
1. From your Shopify admin, click Online Store, then click Themes.
2. Click Customize for the theme you want to customize.
For more information regarding Shopify theme settings, please refer to Theme Setting Guide.
10. SHOPIFY FAQS
11. SUPPORT
Knowledge Base
Before filing a new support ticket, please follow the steps below to assist us expedite your request. This is for everyone’s advantage and will assist to make the entire process more efficient. It’s critical, and we ask that everyone to these guidelines.
Read the item documentation first:
The documentation covers all the item setting and configuration. You may find the solution for your issues here.
Important considerations for your website:
- Runs the most recent version of the item and validate all Theme Requirements.
- Disable any other third-party plugins you may be using to see whether this resolves the issue.
- Clear and deactivate all caches, including browser, plugin, and server caches.
To open a support ticket for the item on our HELP CENTER, choose the Department and then provide the order ID in the ticket and submit. Please keep in mind that providing us with information about your website and some screenshots of the problem will make it simpler for us to answer your query and assist you more quickly.
Important!
DO NOT REPLY TO THE TICKET VIA THE EMAIL NOTIFICATION. Any responses sent via this no-reply-email may be overlooked since our support team was unable to view them.
If you have any problems with the ticket system, please contact us at [email protected] for assistance. However, the first option is more convenient and makes it easy for both of us to monitor the problems.


